chin-chin
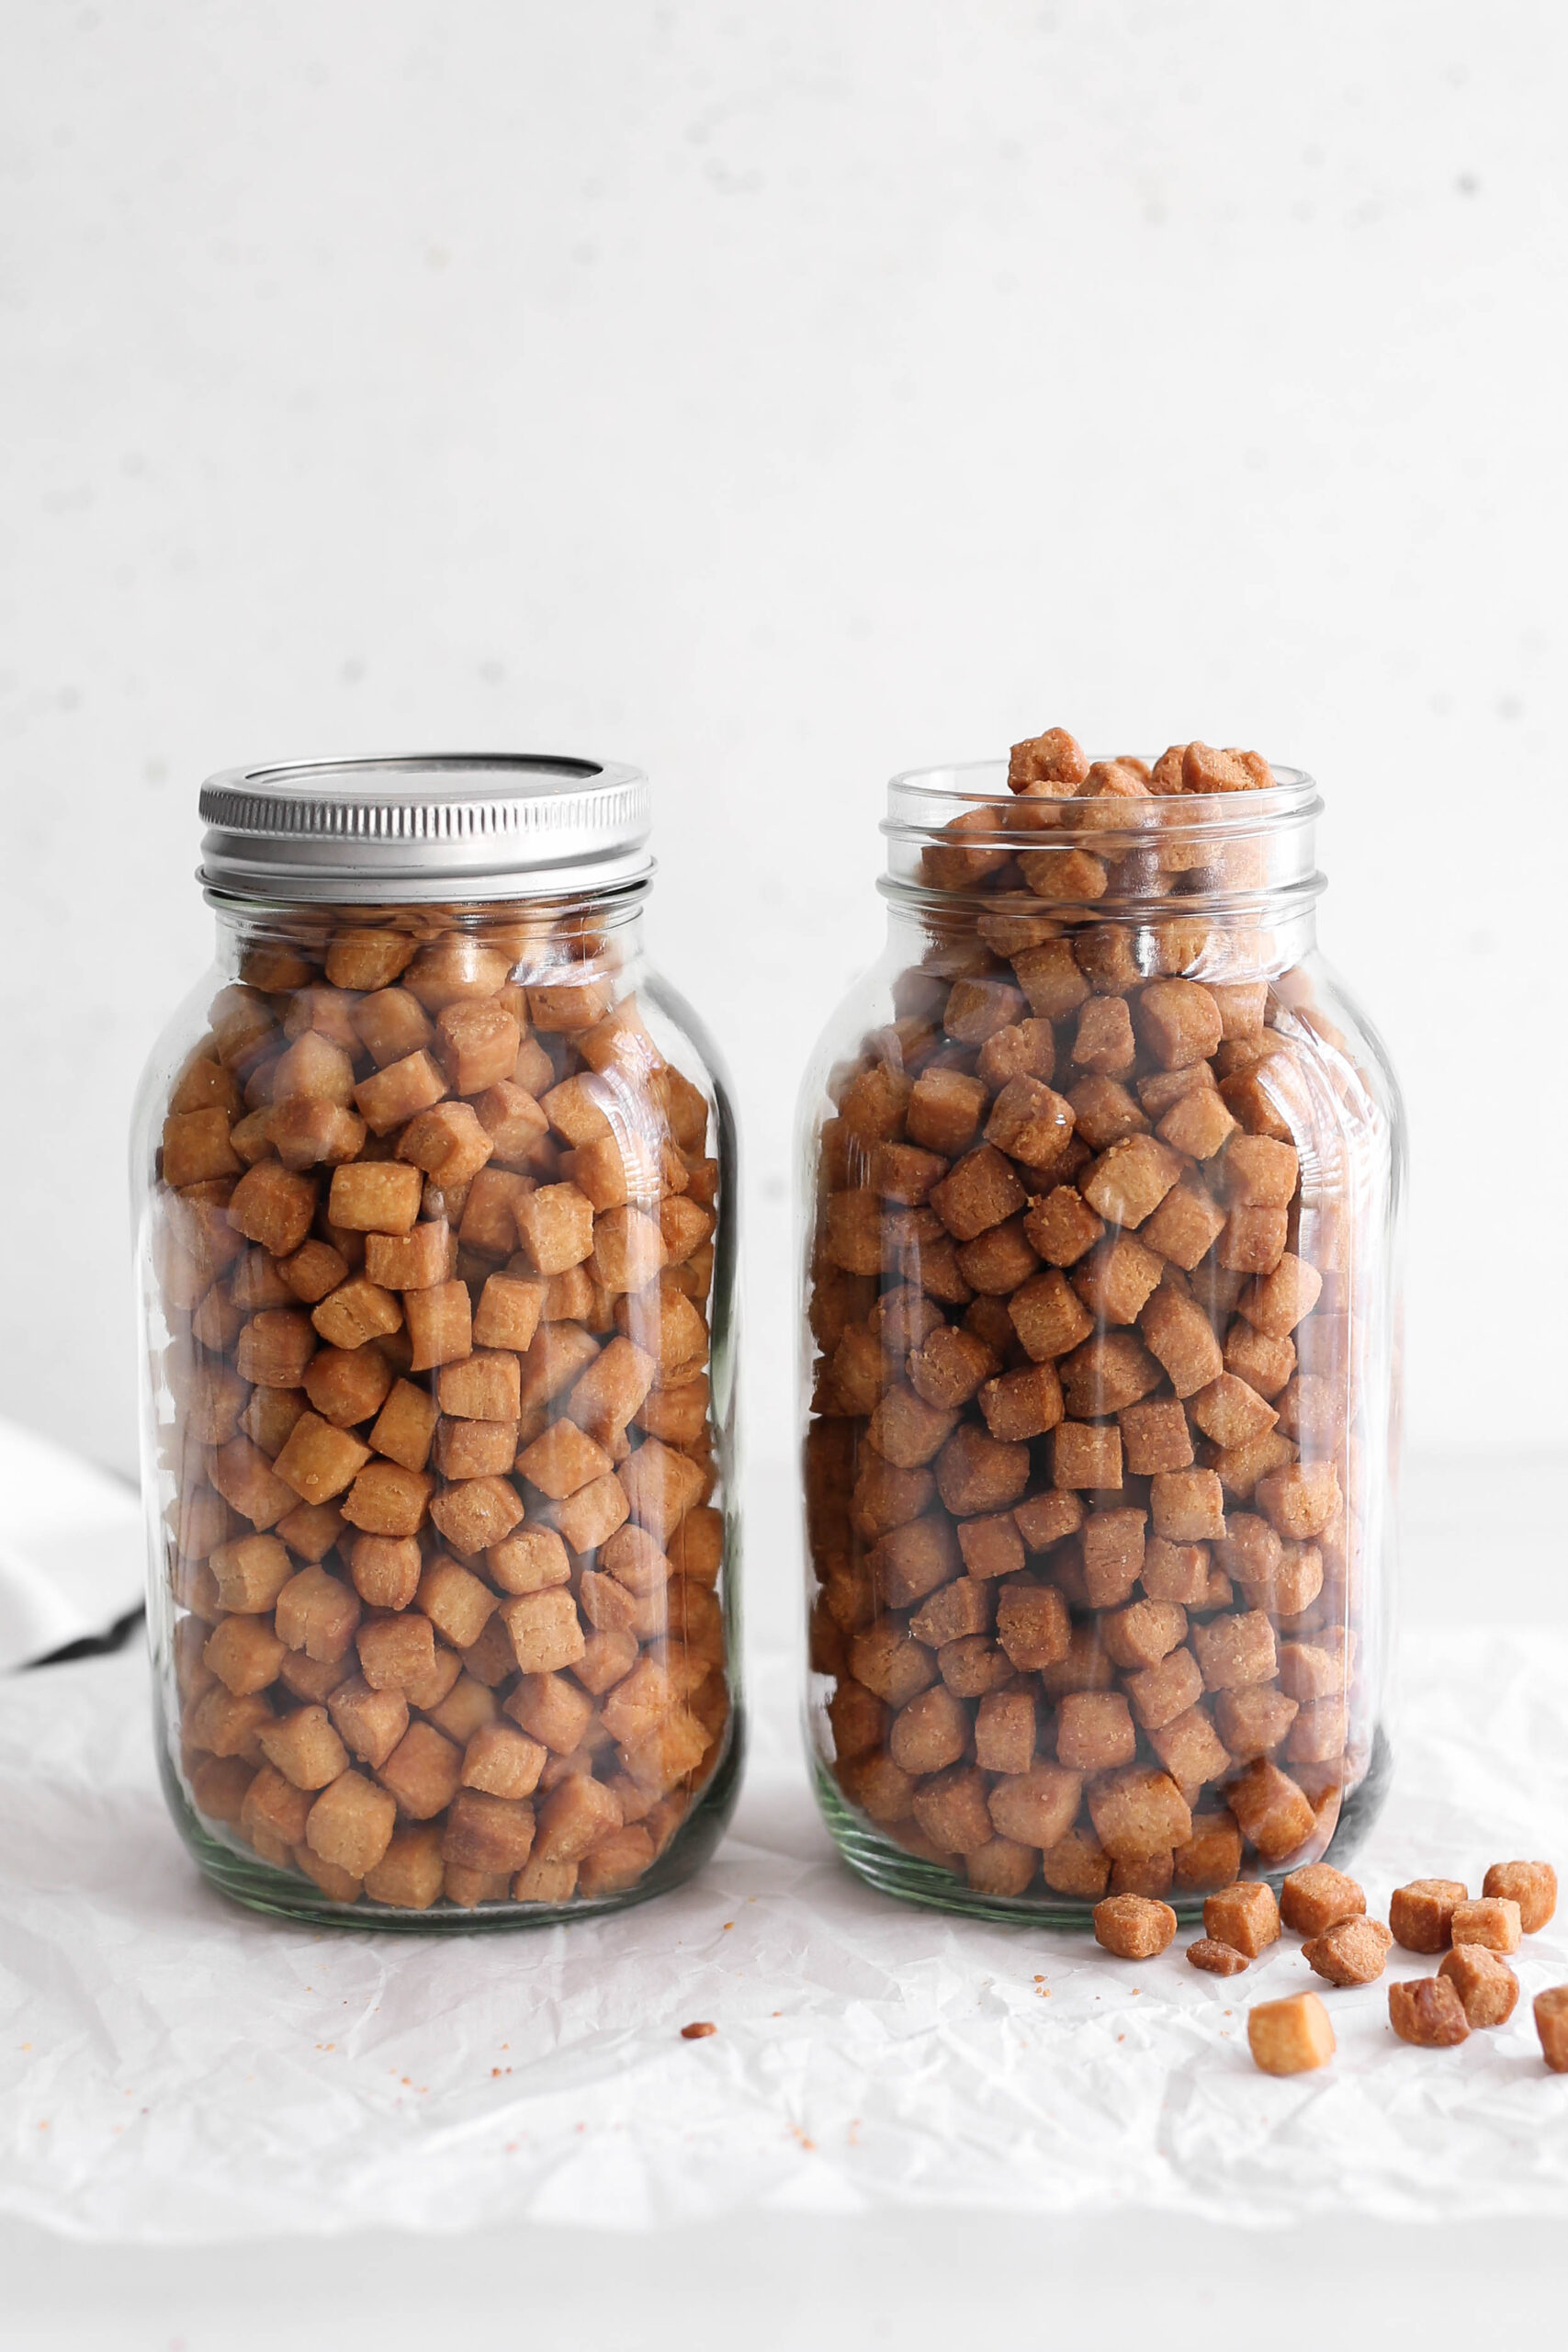
A classic Nigerian snack; golden, crispy, and irresistibly sweet. Chin chin is the perfect snack to satisfy any craving. With just a few simple ingredients, you can recreate this classic treat at home. Let’s dive into the recipe and enjoy every crunchy bite!
chin-chin
If there’s one Nigerian snack that truly shines when made at home, it’s chin chin. Forget the store-bought version, homemade chin chin is unbeatable! While it might seem like a lot of work at first, you’ll be surprised at how simple it actually is. This crispy, addictive treat is a crowd favorite that you’ll find yourself reaching for again and again. I’ve experimented with all kinds of chin chin recipes, but today, I’m sharing the classic version that’s sure to hit the spot. Let’s get rolling!
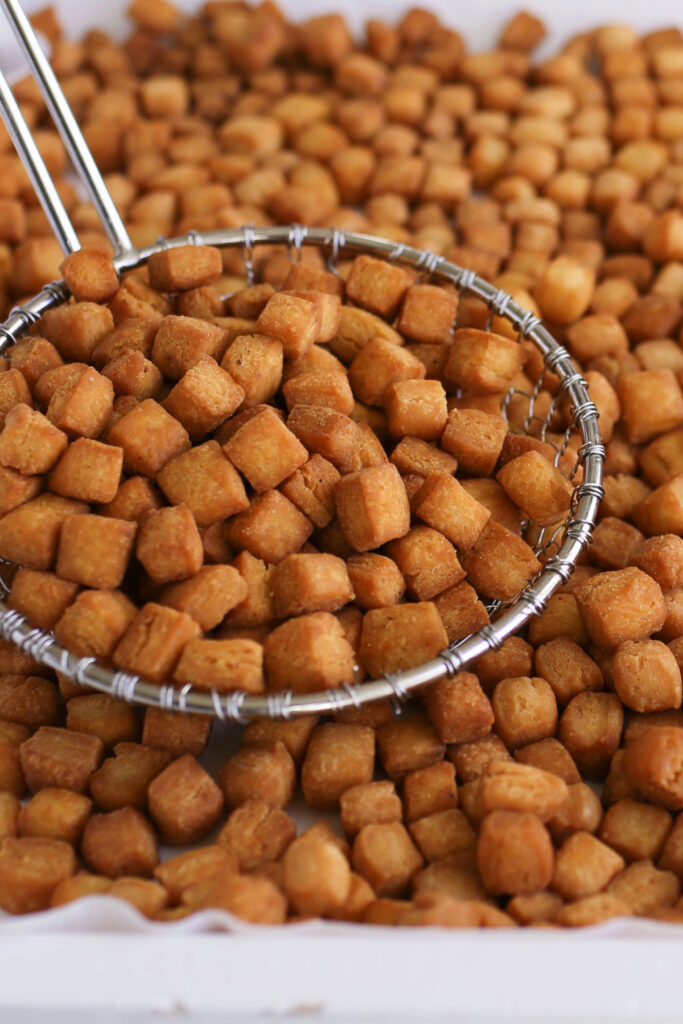
“Making this chin chin is easy, stopping yourself from eating the whole batch? Now that’s the real challenge!”
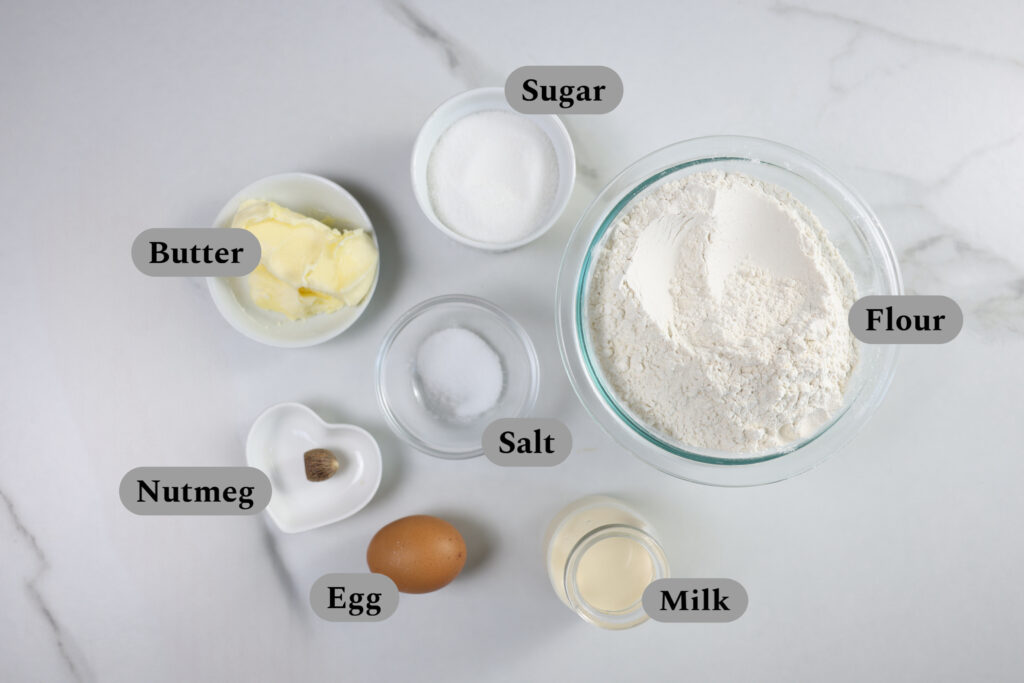
What you’ll need
- Flour: this recipe calls for all-purpose flour for the best texture as other alternatives might alter the taste and texture. For example, confectionery flour might make the chin chin too soft and crumbly while bread flour might make it too strong.
- Butter: I used unsalted butter for this recipe but you can use salted butter/margarine as a substitute. If using salted butter, omit or reduce the salt so it doesn’t get too salty.
- Sugar: you don’t need too much sugar for this recipe to get the yummiest results.
- Egg: I like my chin chin crunchy and adding egg to the dough helps me achieve the perfect texture every time.
- Nutmeg: this always gives chin chin a unique flavor and I absolutely love the smell of it. If you don’t have nutmeg or you are not a fan of nutmeg, you can substitute with cinnamon or other flavors you prefer or you can leave it out completely.
- Milk: I usually like to use evaporated milk for my chin chin. It helps make the chin chin rich in taste You can substitute with whole milk/full cream milk or water if you want to skip the milk completely.
step by step guide
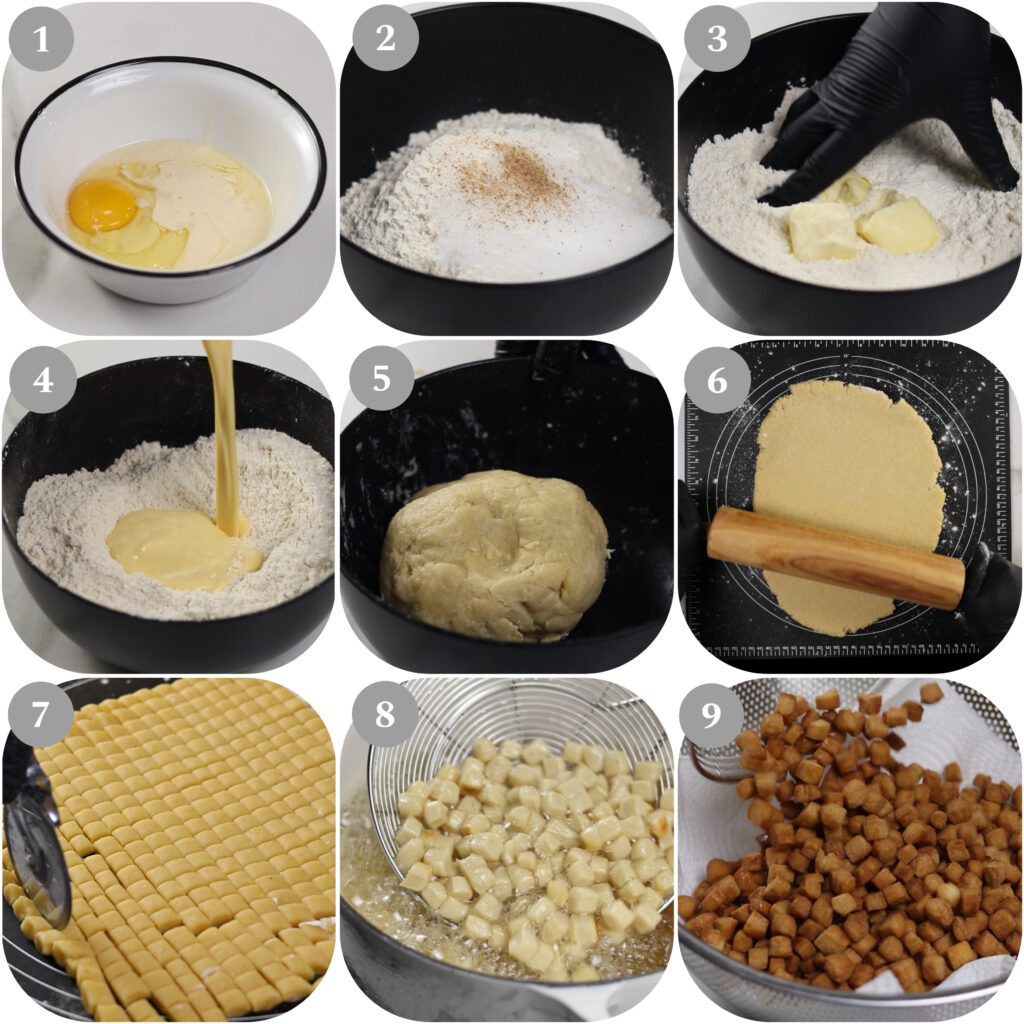
- Prepare the Wet Ingredients: Start by mixing the egg with milk in a small bowl. If you prefer using powdered milk, mix a few tablespoons of it with water to get about the same amount of liquid as the evaporated milk, then set it aside.
- Mix the Dry Ingredients: In a large bowl, combine the flour, sugar, salt, and nutmeg. Mix the dry ingredients well.
- Incorporate the Butter: Add the room temperature butter or margarine into the dry ingredients and use your fingers to rub it into the flour until the texture is crumbly, like breadcrumbs.
- Mix wet and dry ingredients: Pour in the wet ingredient (egg and milk mixture). Stir everything together until a dough forms.
- If the dough feels too hard or dry, add a little water or milk (just a tablespoon at a time) until it becomes soft and easy to work with. If it’s too sticky, sprinkle in some flour until it’s manageable.
- Roll Out: Once the dough has come together, place it on a floured surface and knead until smooth. Roll out to about 1/4 inch thick.
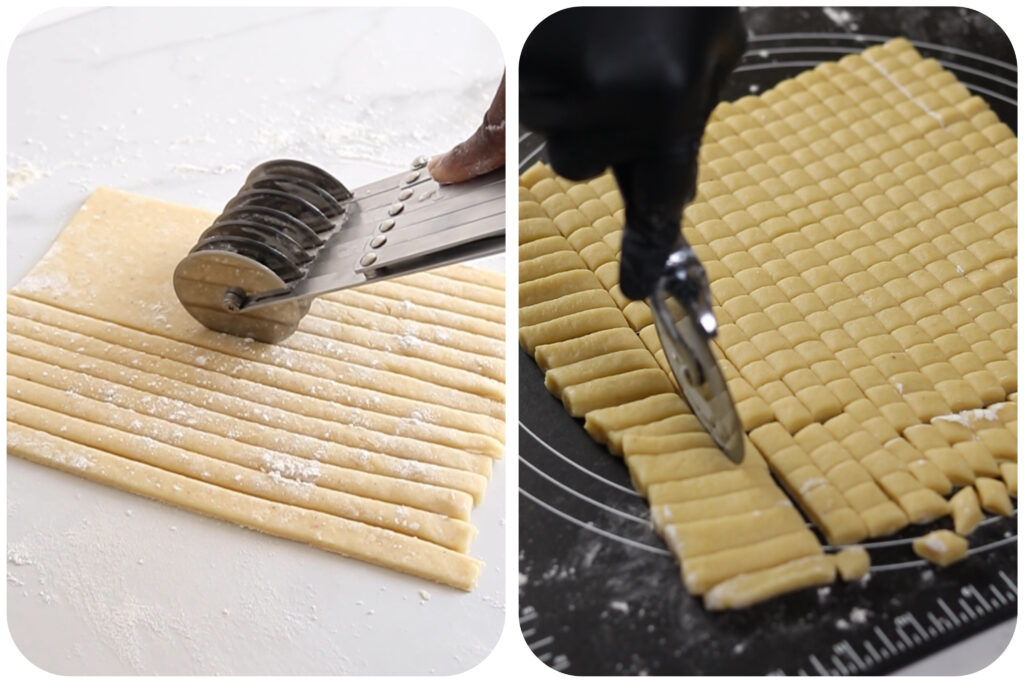
- Cut the Dough: Cut the rolled-out dough into small squares, rectangles, or any shape you prefer using a knife or pizza cutter. Lightly dust the cut pieces with flour to prevent them from sticking together.
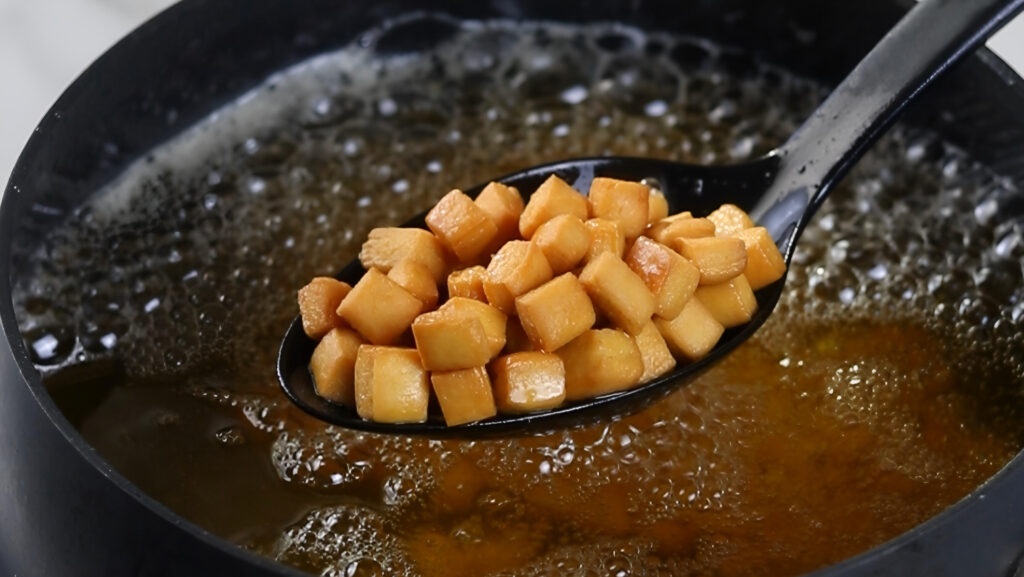
- Fry the Chin Chin: Heat oil in a deep pan until ready for frying. To test, drop in a small piece of dough; if it sizzles without browning too quickly, the oil is at the right temperature. Carefully add the chin chin to the hot oil in small batches, avoiding overcrowding. Fry, stirring occasionally, until they turn a golden brown.
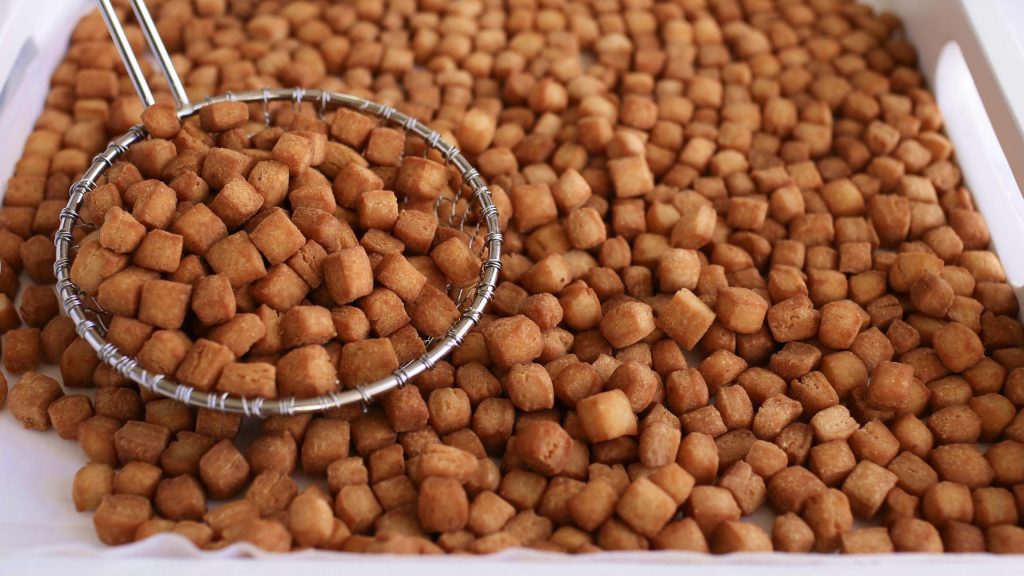
- Drain and Cool: Using a slotted spoon, lift the chin chin from the oil, allowing any excess to drip off. Transfer to a plate lined with paper towels or place on a metal sieve to soak up any remaining oil. Allow the chin chin to cool fully before serving…this cooling time adds extra crunch! Once completely cooled, store and enjoy the crispy goodness!
how to make chin chin in a food processor
Chin chin is an easy snack to make, and using a food processor makes it even simpler. Here’s how to do it…
Start by adding all the dry ingredients, including flour and sugar, into the food processor. Add the butter and pulse for a few minutes until the butter is well mixed into the flour.
Next, pour in the wet ingredients and process for about five minutes until the dough comes together.
Note: The dough may feel a bit softer because the heat from the food processor can warm it up. To fix this, take the dough out of the food processor, knead it gently by hand, and place it in the fridge for about five minutes (this helps the dough firm up). Once it’s cooled, take it out, roll it out, cut into pieces, and proceed to fry.
How to Make your Chin Chin Healthier
If you want to make chin chin healthier, you can try baking or air frying instead of deep frying. These methods cut down on the amount of oil, making the snack lighter but still delicious. Here’s how to do it:
Air-Fried Chin Chin
In my opinion, air-fried chin chin is even tastier than the traditional fried version. For a healthier, crispy option, air frying works wonderfully. Preheat the air fryer to 350°F (175°C), then arrange the chin chin pieces in a single layer in the basket. Air fry for about 15 minutes, shaking the basket every 5 minutes for even cooking and to keep them from sticking together. Continue until the chin chin is golden and crispy.
To watch how to make it with an air-fryer, click here
Baked Chin Chin
For the baked method, preheat your oven to 350°F/175°C. Line a baking pan with parchment paper, especially if your pan isn’t nonstick. Spread the chin chin pieces evenly on the pan and bake for about 10 minutes. Just like with the air-fried method, shake or stir the chin chin halfway through to ensure even baking. Bake until they are golden and crisp, then remove from the oven, allow to cool before storing.
Variations
I love experimenting with my chin chin recipe and creating new flavors. Here are a few variations that I absolutely love!
Carrot chin chin
After incorporating carrots into my buns recipe which came out totally amazing! I decided to experiment with my chin chin recipe. I simply added blended carrots into the dough which adds a natural sweetness and a hint of color. The carrots not only make the chin chin more nutritious but also add a slight twist to the classic flavor, making it a fun way to sneak in some veggies. Click carrot chin chin to see how I make it.
Gingerbread chin chin
By putting a twist on classic gingerbread and blending it with chin chin, Gingerbread Chin Chin offers warm, spicy flavors—perfect for the holidays or whenever you’re craving a cozy, spiced treat. Click here to watch how I make it.
Banana chin chin
Using bananas makes it simple to create an egg-free version of this recipe. Perfect for vegetarians, just replace the eggs with mashed ripe bananas, which add a subtle banana flavor and natural sweetness, meaning you can use less sugar. It’s also a great way to use leftover bananas, resulting in a slightly softer and more fragrant snack. Let me know if you’d like me to include the link! watch how to make it here.
Spicy chin chin
Spicy chin chin is for those who love a bit of heat! By adding spices like cayenne pepper or chili powder you can create a snack with a spicy kick that balances nicely with the sweetness. Just mix in the dried pepper with the dry ingredients and follow the original recipe but with a little extra zing. Most of my Nigerian friends love this version.
Coconut chin chin
Feeling nutty? Coconut chin chin includes adding shredded/desiccated coconut and/or coconut milk to replace the evaporated milk in the dough, adding a rich, coconut flavor. It has a slightly chewy texture with a hint of coconut, making it a perfect treat for coconut lovers.
Milk coated chin chin
Milky donuts have come and gone but this is definitely here to stay.
For a sweet twist, milk-coated chin chin is dipped in a mixture of powdered milk and sugar after frying. The coating gives it a creamy, melt-in-your-mouth finish that pairs perfectly with the crunchy texture, creating an extra indulgent treat. Recipe coming soon
Chocolate chin chin
For chocolaty chin chin mix cocoa powder into the dough for a rich, chocolaty flavor and deep color. It’s perfect for chocolate lovers, drizzle with melted chocolate for extra sweetness.
Family, fun & Chin chin
Making chin chin with my family during the festive periods is one of my earliest core memories that I’ll forever cherish.
Chin chin was usually the first things we made before the main cooking started usually a day or two before festive days. Once the dough has been mixed, we all hustled to get a portion and start cutting, making our very own “special chin chin” that we would always look out for one it has been fried.
It was a special time to bond with the family and I have been able to continue this tradition with my kids.
Making chin chin can be a fun filled activity for kids with a few adjustments to the process! Here are some ways to make it enjoyable and engaging for children:
Let Kids Help with Mixing
Kids love getting their hands messy! Let them join in by mixing the dough. They can use their hands to blend the butter into the flour…it feels like playing with sand, and the mixed dough has a playdough-like texture. It’s a fun sensory activity that keeps them engaged and excited!
Use Fun-Shaped Cookie Cutters
Instead of the traditional square or rectangular chin chin pieces, let kids use cookie cutters to create different shapes like stars, hearts, animals and even letter-shaped cutters (they can have fun spelling their names). This adds a creative twist and makes the chin chin even more appealing for kids to eat.
Please do not leave kids unsupervised with sharp objects or around hot oil. Cooking is fun, let’s make it safe too😊
Flavor Fun
Allow kids to customize their batch with different flavors like a bit of cinnamon, vanilla, or even cocoa powder for a chocolate twist. They can mix these into the dough and experiment with new tastes.
Turn cooking into an Experiment
If you’re baking or air-frying the chin chin, it’s a safe way to involve kids. They can help place the pieces into the air fryer or arrange them on a baking tray. This also makes it a fun science-like experiment, watching how the dough changes from soft to crunchy.
Decorate the Chin Chin
After the chin chin is cooked and cooled, kids can have fun decorating it. Melt some chocolate and let them dip the edges of their chin chin shapes into it. They can also sprinkle colorful sugar or add a little bit of powdered sugar on top. This step adds a sweet touch and makes it extra fun to eat!
Create a Chin Chin Tasting Party
Turn the finished chin chin into a tasting party! Let the kids taste their creations and compare the different flavors they made. It can be a fun way to introduce them to the world of cooking and baking while enjoying the fruits of their labor.
Tips for Making the Best Chin Chin
Mix ingredients together properly: Mix dry ingredients well before adding the butter.
Properly mix butter and flour together until it resembles coarse crumbs for the best results.
Don’t Overwork the Dough: Mix just until the dough comes together. Overworking it can make the chin chin tough instead of light and crispy.
Flour your work surface: Lightly dust your surface with flour before rolling out the dough; this prevents sticking and makes it easy to lift the chin chin pieces after cutting.
Roll Evenly: Roll the dough to an even thickness, about 1/4 inch, to ensure uniform frying. This helps prevent some pieces from cooking faster than others, so everything comes out with a consistent color.
Check Oil Temperature: Heat the oil over medium heat and test with a small piece of dough. If the oil is too hot, the chin chin will brown too quickly without cooking through.
Fry in Batches: Avoid overcrowding the pot when frying. Frying in small batches helps maintain the oil temperature and ensures even, crispy results.
Use a pizza cutter: In place of a knife, I often use a pizza cutter. For a more even cut I also find a pastry wheel cutter to be effective and fast.
Use a deep pot: Chin chin oil tends to foam up the more you use it, so it’s advisable to use a deep pot and the oil should be about/half of the pot to avoid any accidents as oil is extremely flammable.
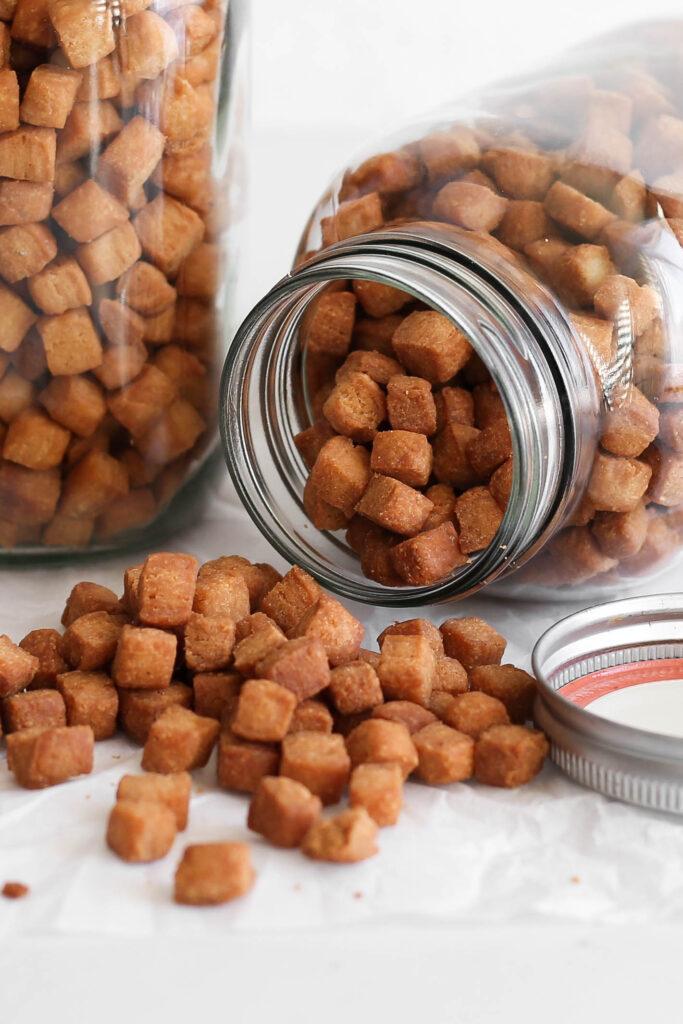
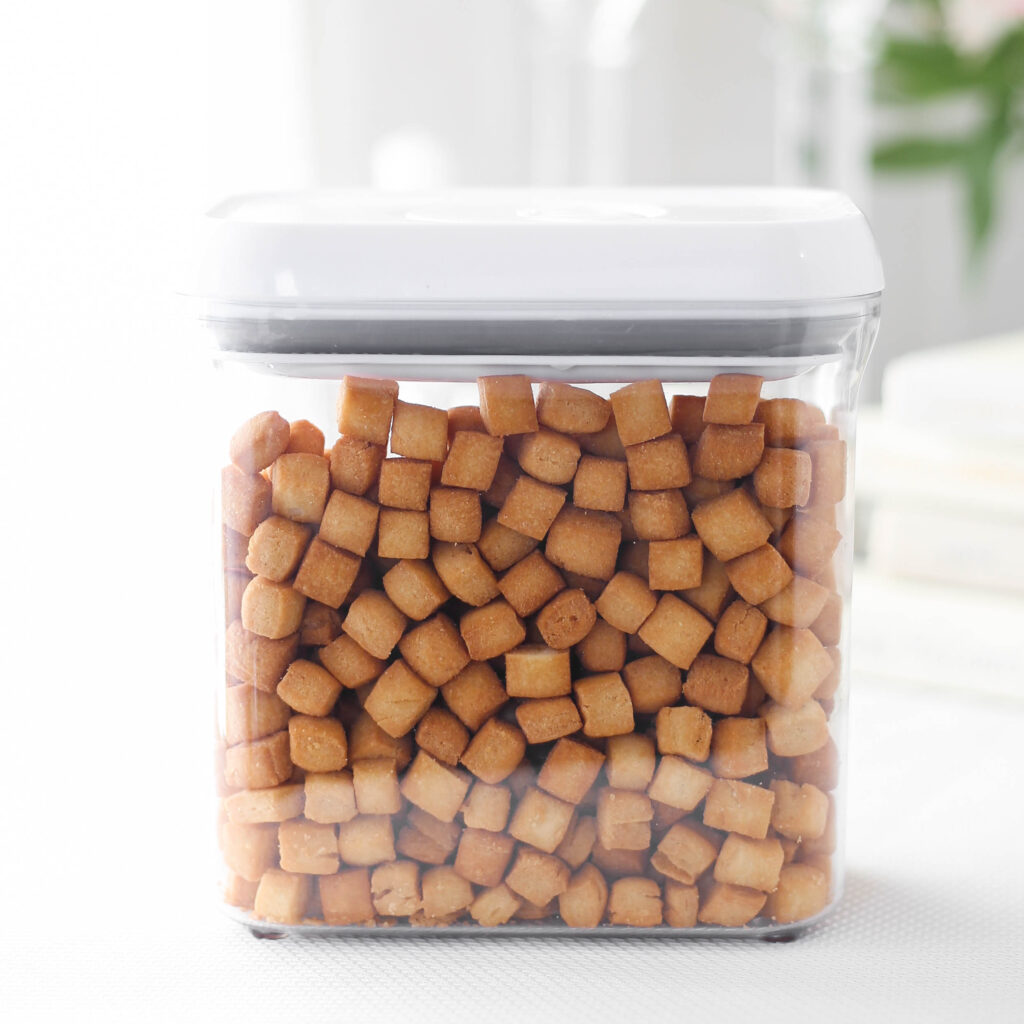
Cool Properly: After frying, let the chin chin cool completely on a paper towel or a wide metal sieve to maintain the crunchiness. Store in an airtight container to keep it fresh for longer.
Customize to Taste: Adjust the amount of nutmeg or add a splash of vanilla for a twist. You can also adjust the sweetness to your taste.
How to store/make your chin chin last longer
Cool Completely: Allow the chin chin to cool completely before storing it. Storing while warm can cause condensation, making it soggy.
Use a vacuum sealer: These are pretty inexpensive and makes your chin chin last for a very long time. I’ve used this to store chin chin and send to friends and family abroad and it stays fresh!
Use an Airtight Container: Store chin chin in an airtight container to prevent moisture from getting in, which helps maintain its crunchiness.
Add a Paper Towel: Place a paper towel at the bottom of the container to absorb any excess moisture and keep the chin chin crisp.
Store in a cool, dry Place: Keep the container in a cool, dry place, away from heat or direct sunlight, to preserve the texture and flavor.
Avoid the Fridge: Do not refrigerate chin chin, as it can cause it to become stale faster due to moisture buildup.
Freeze for Longer Storage: For extended storage, place chin chin in a sealed freezer bag. When you’re ready to enjoy them, thaw at room temperature, and they will retain their crunch. To heat, simply bake or airy them for 2-3 minutes.
Note: if you have siblings or chin chin lovers that won’t let you eat your chin chin last or you just don’t like sharing, best way to protect and store your chin chin would be to lock it in a safe or chest and hide it under your bed😁
faqs
Why is my chin chin too hard?
If your chin chin turns out too hard, it could be due to overworking the dough or rolling it too thin. Mix the dough just until it comes together and roll it to about 1/4 inch thickness for a balance between crunchiness and a softer inside.
How do I store chin chin to keep it fresh?
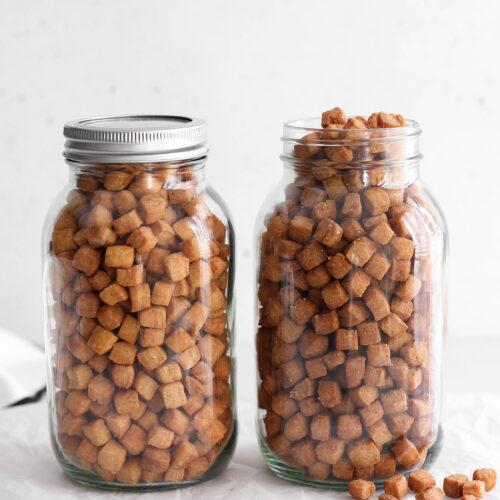
Store cooled chin chin in an airtight container to keep it fresh and crunchy. It can last for up to 3-4 weeks when stored properly in a cool, dry place.
What kind of oil is best for frying chin chin?
Neutral oils like vegetable oil, canola oil, or sunflower oil are best for frying chin chin. These oils have a high smoke point and won’t overpower the flavor of the chin chin.
How can I make my chin chin crunchier?
For a crunchier texture, roll the dough thinner and fry it a bit longer until it’s a deeper golden brown. You can also reduce the butter slightly for an extra crisp texture.
Can I add other flavors to my chin chin?
Absolutely! You can experiment with adding cinnamon, vanilla extract, or even a bit of coconut flavor for a unique twist. Adjust the flavors to your taste preference.
Can I use margarine instead of butter for chin chin?
Yes, you can use margarine instead of butter in the chin chin recipe. It will yield a slightly different flavor but will still produce a delicious snack. You may want to reduce or skip the salt also.
Can I make chin chin without eggs?
Yes, you can make chin chin without eggs by using a bit more milk or adding water to adjust the dough consistency. The texture may be slightly different but still delicious. I also have an eggless chin chin recipe you can check out here
Why did my chin chin absorb too much oil?
If the oil temperature is too low, chin chin can absorb more oil, making it greasy. Ensure the oil is hot enough (about 350°F or 175°C) before adding the dough. Test with a small piece of dough, it should sizzle and brown slowly. If it browns immediately then the oil is too hot. Also make sure not to overcrowd the pan as that can cause the temperature of the oil to go down too much.
What can I do if my chin chin dough is too sticky?
If your chin chin dough is too sticky, add a little more flour, about a tablespoon at a time, until it’s easier to handle. Be careful not to add too much, as this can make the dough dry.
Why does my oil foam when I fry chin chin?
Foaming oil is usually as a result of impurities like flour in the oil. Other factors that can cause your oil to foam includes;
Excess Flour: Flour dust on the chin chin can create bubbles as it cooks, leading to foam.
Dirty Oil: Reusing unfiltered oil can cause foaming as leftover particles burn.
Overcrowding the Pan: Adding too many pieces at once lowers the oil temperature, leading to foaming.
Turning too quickly: Once you add the chin chin pieces allow to fry for a few seconds before turning it. Remember to use a slotted spoon, this also helps to reduce oil bubbles.
How to Prevent Oil from Foaming:
Shake Off Extra Flour: Remove loose flour before frying to minimize foaming.
Change the oil: If frying a really large batch of chin chin, endeavor to change the oil after several batches if the oil continues to foam too much.
Use Clean Oil: Strain oil after frying if there are too many particles.
Watch how to make it
Ingredients
- 1 whole egg
- ¼ cup evaporated milk 90 ml
- 400 grams all-purpose flour 3 cups
- 114 grams sugar ½ cup
- 100 grams butter or margarine (6 tablespoons)
- 4 grams salt (½ teaspoon)
- ½ teaspoon nutmeg freshly grated
- Oil for frying
- Extra flour for dusting
Instructions
- In a small bowl, whisk together the egg and evaporated milk until well combined and set aside.
- Combine Dry Ingredients by In a large mixing bowl, add the flour, sugar, salt, and freshly grated nutmeg (if using powdered milk, add to dry ingredients). Mix everything together until evenly combined.
- Add the butter or margarine to the flour mixture.
- Use your fingers to rub the butter into the flour until the mixture looks like bread crumbs.
- Make a well in the center of the flour mixture and pour in the egg and milk mixture.
- Mix everything together with a wooden spoon or your hands until a smooth dough forms.
- If the dough is too sticky, add a little more flour, one tablespoon at a time, until it becomes firm but pliable.
- Lightly flour a clean surface and roll out the dough to about 1/4-inch thickness.
- Use a sharp knife or pizza cutter to cut the dough into small squares about 1/2 inch in size or your preferred shape.
- Pour oil into a deep pan or pot (enough for deep frying) and heat it on medium heat until it reaches about 350°F (175°C). If you don’t have a thermometer, drop a small piece of dough into the oil; it should sizzle but not brown quickly.
- Carefully add a handful of the cut dough pieces into the hot oil, making sure not to overcrowd the pan.
- Fry until golden brown, stirring occasionally for even cooking.
- Remove the chin chin from the oil and place them on a paper towel-lined tray to drain excess oil. Repeat with the remaining dough.
- Allow the chin chin to cool completely before serving. Store in an airtight container to keep them fresh and crunchy for up to 2 weeks.
- Enjoy your delicious chin chin!
Notes
- Customize: Adjust nutmeg, add vanilla, or tweak sweetness to your liking.
Did you make this recipe?
Tag, mention or DM @kikifoodies. I would love to hear from you!

The recipe are really nice am gonna give it a trial and give feedback
Bravo!
What ever you are doing is great, keep going… Food is heart to heart confession of true love… And that’s what you always bless my screen with.
Thank you.
Easy Peasy…..thank you so much hl
I’m wowed!!
Great!