Jollof rice
Jollof brings everyone together. This recipe has been perfected over time...tested, trusted and loved by many.
Jollof rice
Jollof rice is the life of every party and the dish that sparks friendly debates far and wide! Whether you’re team Nigerian, Ghanaian, or have your own special way, one thing is for sure: Jollof brings everyone together. This recipe has been perfected over time…tested, trusted and loved by many. Ready to master the art of that perfect, smoky, jollof?
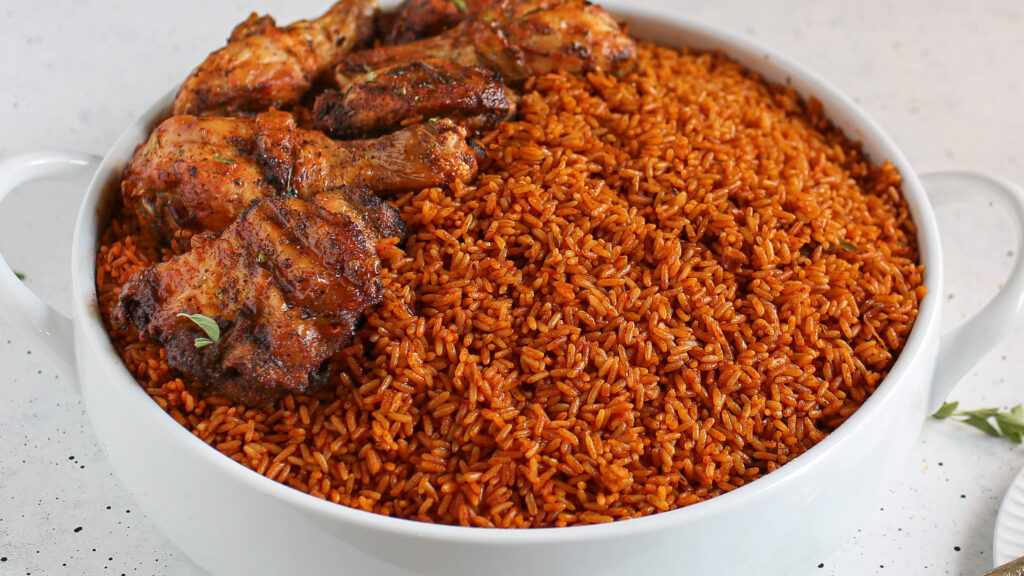
Nigerian jollof rice
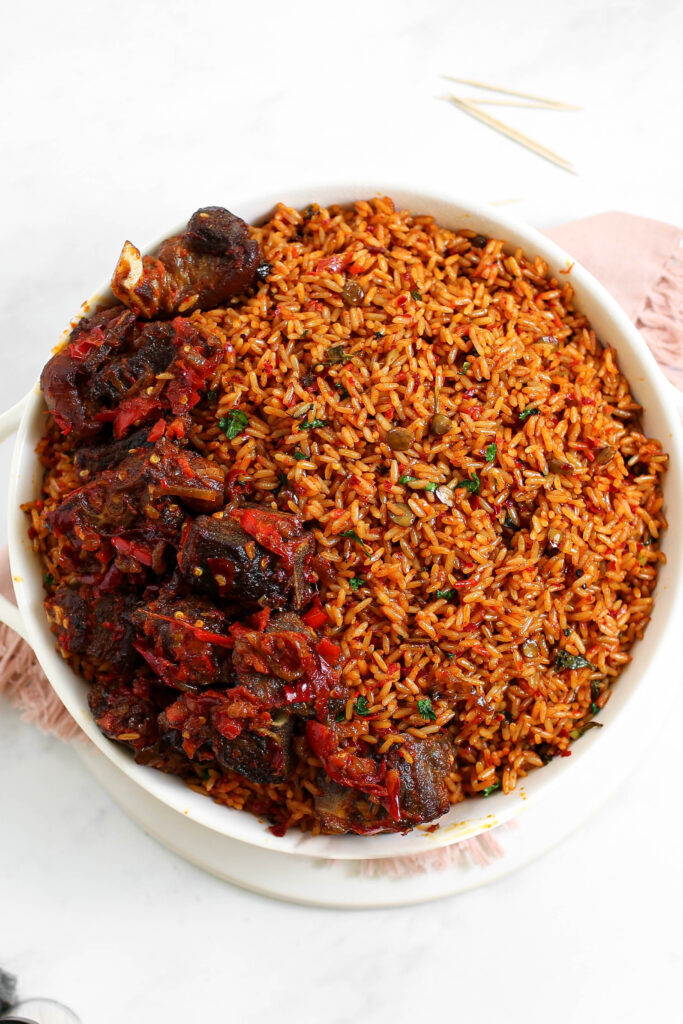
Nigerian Jollof is a mix of smoky, savory, and slightly sweet flavors that stands out. What makes it special? It’s all about the blend of tomatoes, peppers, and just the right amount of spice that gives it a rich, unforgettable taste. It’s more than just a meal; it’s a national treasure.
How to make the best Jollof Rice in 3 easy steps:
- Make the stock – Season and cook meat, strain to save the stock, and fry or grill the meat.
- Make the jollof base – Blend tomatoes and peppers, and onions. Reduce until thick.
- Cook the rice – Fry tomato paste, add sauce, seasonings, stock, and water. Add rice and cook until done.
What You’ll Need and Subs
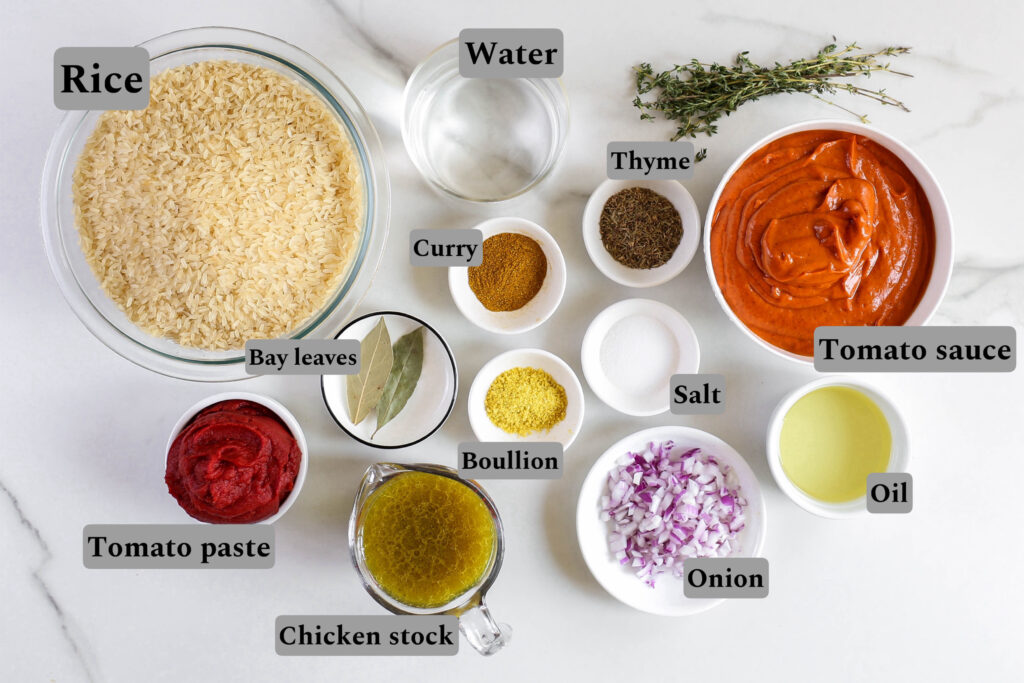
- Rice: Long-grain parboiled rice is traditionally used for Nigerian Jollof because it soaks up flavor beautifully without becoming mushy. Sella basmati rice is another great option for a lighter version.
- Protein: We’ll be using chicken for the stock, but feel free to switch it up with beef, turkey, or goat meat to create a different flavor profile.
- Peppers: You’ll need tatashe (red bell pepper) and atarodo (scotch bonnet). If you don’t have atarodo, you can substitute it with habanero, bird’s eye chili, or any spicy pepper you prefer. Adjust the pepper to match your heat tolerance or leave it out entirely if you like it milder.
- Tomatoes: Roma tomatoes are ideal because they offer a perfect balance of acidity and sweetness for that rich Jollof flavor.
- Tomato Paste: This helps deepen the color and enhance the overall flavor of the Jollof rice.
- Meat Stock: Homemade stock is best for authentic depth of flavor, but a high-quality store-bought stock or broth will work as a backup option.
- Spices and Seasonings: Key spices include garlic, ginger, thyme, curry powder, bay leaves, bouillon cubes, and salt.
Choosing the Right Type of Rice
For the best Jollof, use long-grain parboiled rice, which holds its structure during cooking. You can also try sella basmati rice for its similarly firm nature. You want to avoid jasmine or short-grain rice as they tend to be too sticky for Nigerian Jollof. Check out some recommended rice brands for each type:
| For parboiled long-grain rice | For sella basmati rice |
| -Par Excellence long-grain rice (Nigeria, USA) -Zatarain’s Enriched long-grain rice -Golden Canilla parboiled rice -Iberia parboiled long-grain rice -Uncle Ben parboiled rice | -Indian Gate sella basmati rice (USA) -Royal sella basmati rice -Tilda sella basmati (UK) -Tropical sun sella basmati(UK and Nigeria) |
Step-by-Step Guide to Making Nigerian Jollof Rice
Step 1a: Make the Meat Stock
In most Nigerian cooking, many of our dishes require homemade stock. Don’t worry…it’s very easy to make!
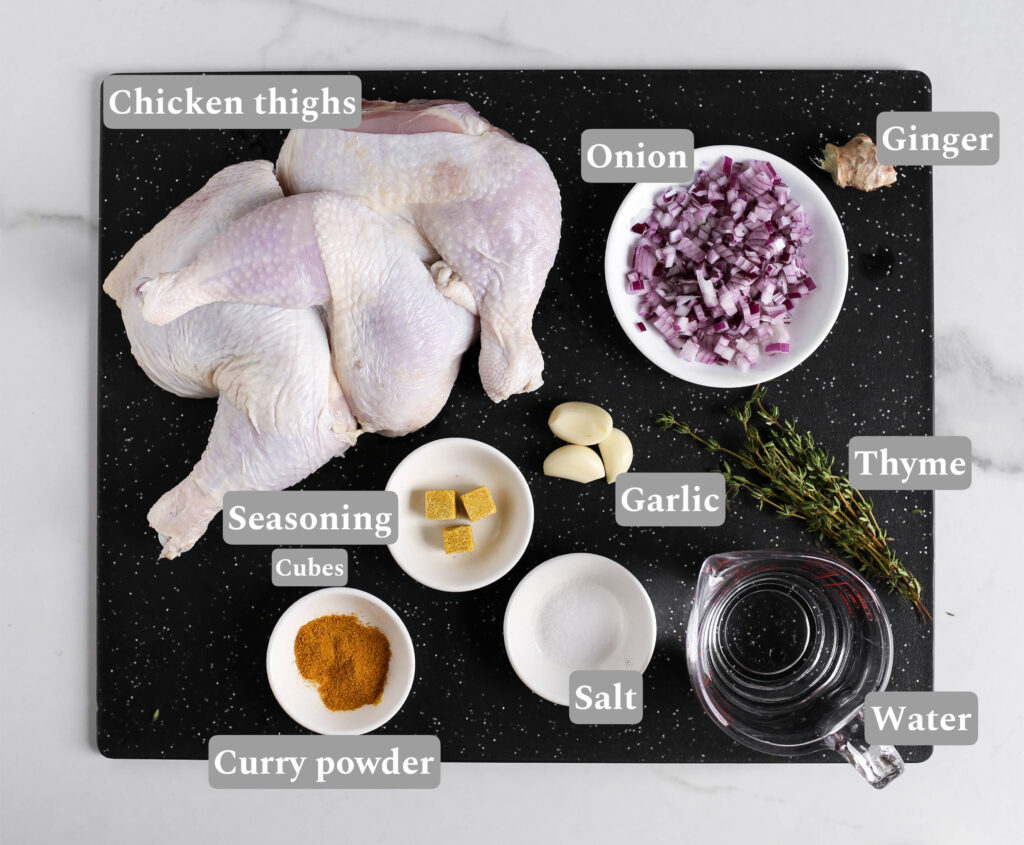
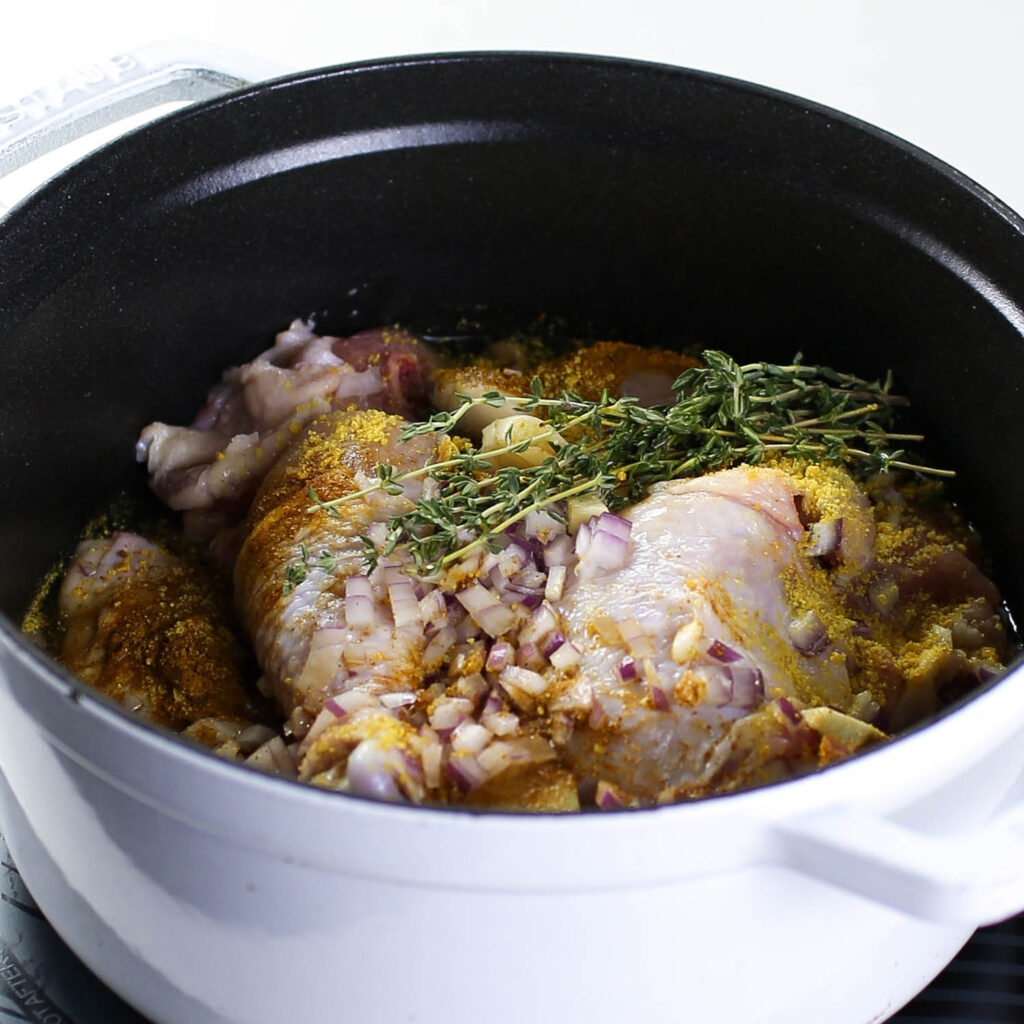
- First, Cut the meat into smaller pieces; you can use chicken, beef, turkey, or goat. Keep in mind that each type of meat brings a unique flavor to the final dish. For a more neutral taste, go with chicken or beef.
- Boil the meat with chopped onions, crushed garlic, ginger, salt, a bouillon cube, curry powder, and thyme (fresh or dried).
- Don’t add water just yet…mix everything, then cover and let it steam on low heat. The chicken will release its own juices, giving you maximum flavor, that “sweet-to-the-bone” goodness.
- After about 10 minutes, add water and let the chicken boil a bit longer to create a rich stock. Once the chicken is cooked, remove and strain the stock to remove any bones or large chunks of ginger. Your stock is ready. Easy peasy!
Step 1b: Fry the meat
- Pour enough oil into a pan or pot (I prefer using the same pot I’ll make the Jollof in—it makes cleanup so much easier!). Heat over medium-high heat.
- Carefully add a few pieces to the hot oil, making sure not to overcrowd the pan. For extra flavor, toss in half an onion with the root still attached!
- Fry in batches until the meat turns a perfect golden brown.
- Once crispy, transfer the meat to a plate lined with paper towels to soak up any excess oil.
Save the frying oil to make the jollof…It’s Flavor Gold
Want to keep it light?
You can also air fry or bake the meat! Spray with oil and pop it in an air fryer or a hot oven at 400°F (200°C) until it’s browned and crispy. This keeps the meat juicy inside while adding that nice crust on the outside…no drying out!
Step 2: Prepare the Jollof Base
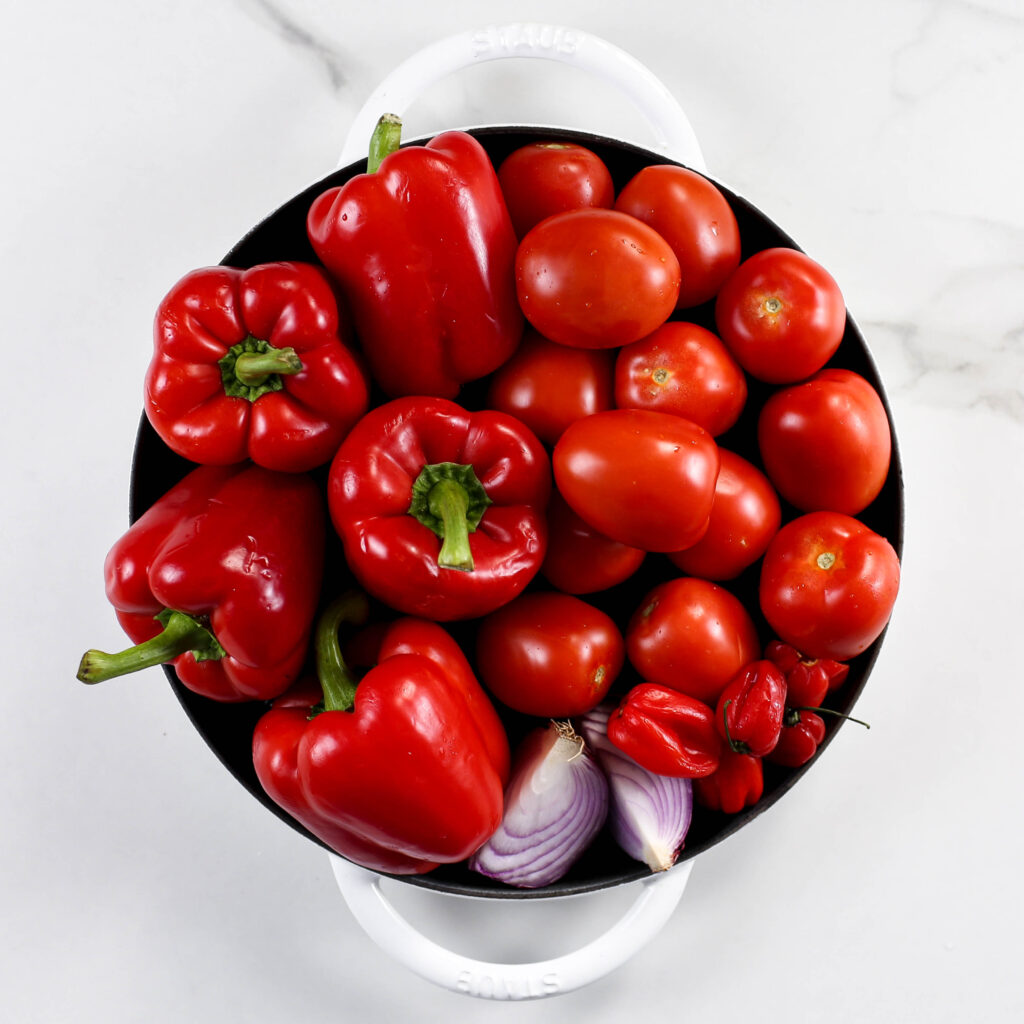
The tomato base is the heart of Jollof rice, and getting it right is key! There are two main ways to make it, and you’ll need the perfect balance of tomatoes, bell peppers, onions, and scotch bonnet peppers. Here’s my go-to ratio: 50% bell peppers, 40% tomatoes, 5% hot peppers, and 5% onions.
- Boil and Reduce (Traditional): Blend a mixture of tomatoes, bell peppers, onions, and Scotch bonnet peppers. Then, boil it in a pot over medium heat until the liquid evaporates. No oven needed.
- Roast and Blend (Enhanced Flavor): Roast the tomatoes, bell peppers, onions, and Scotch bonnet peppers in the oven until slightly charred then blend until smooth.
Option 1: Blend and Reduce
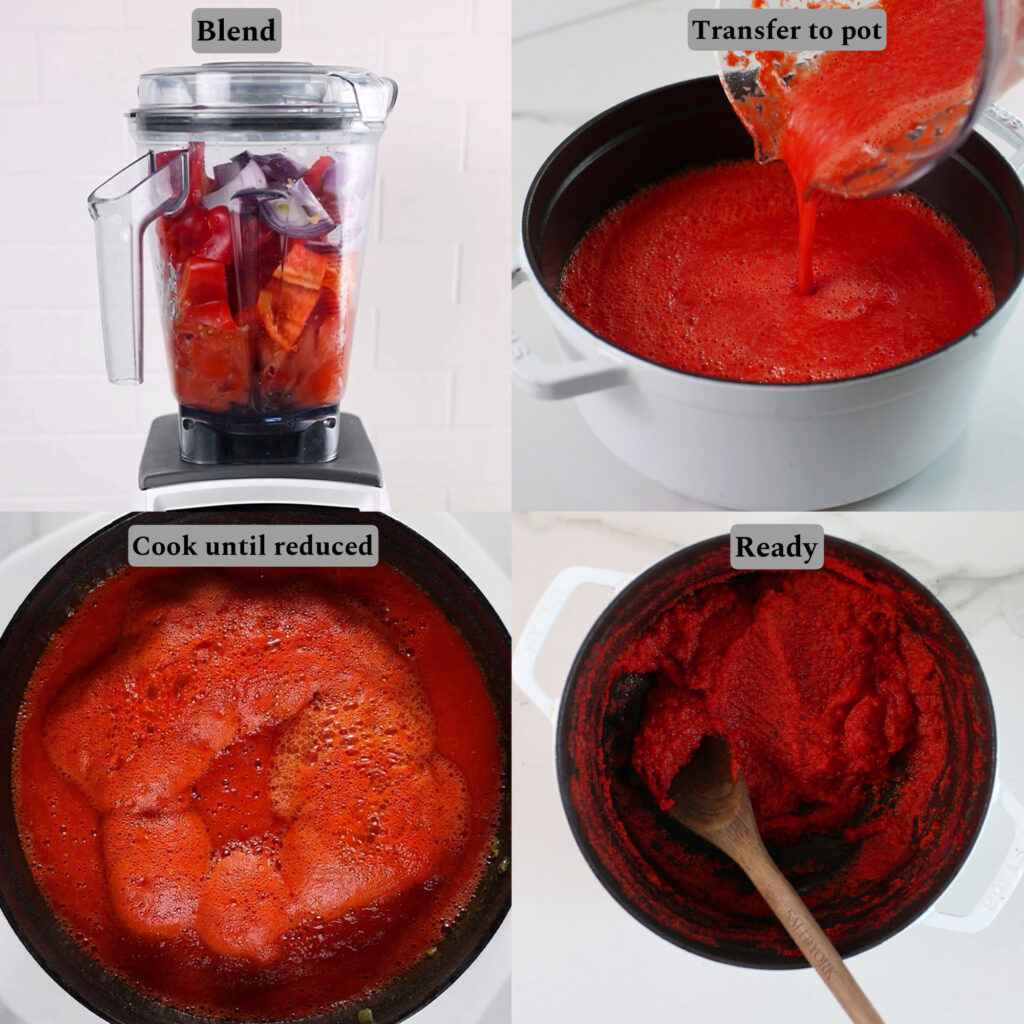
1. Blend the tomatoes, red bell peppers, and onions into a smooth paste.
Tip: Add crushed/chopped tomatoes first when blending. Their high water content means you’ll need minimal water to blend the rest.
2. Transfer the mixture to a pot (you can use the same pot you used for making the meat stock to minimize cleanup) and cook on medium heat for about 40 minutes. Let the water evaporate until you’re left with a concentrated paste.
Tip: Avoid stirring the blended tomato and pepper mixture once it’s in the pot to prevent splattering.
option 2: Roast and blend
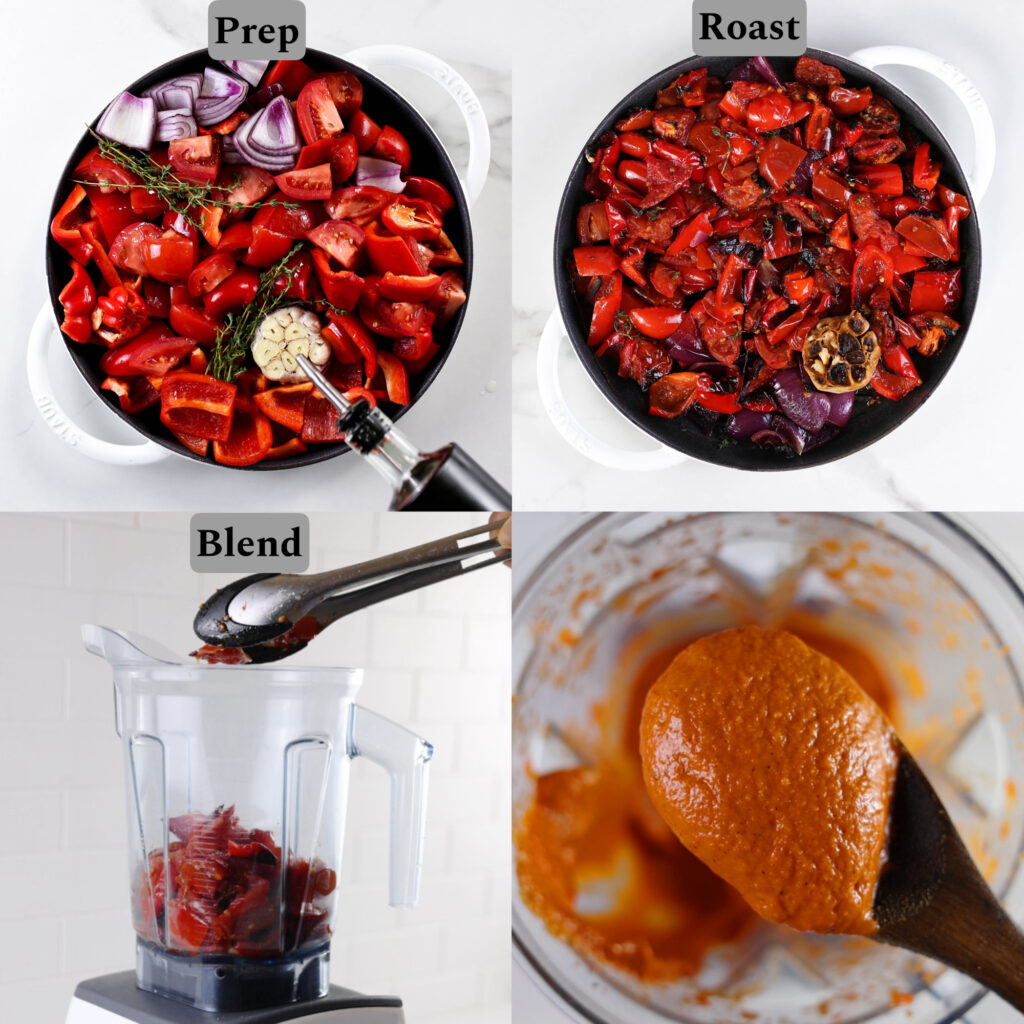
- Cut the tomatoes, bell peppers, onions, and garlic into smaller pieces, leaving the garlic in its shell to prevent burning.
- Place the vegetables in an oven-safe dish and roast at 400°F (200°C) for about 30 minutes, stirring halfway through.
- Once roasted, blend to a smooth paste.
Step 3: Cook the Jollof Rice
First, fry the base: Heat a few tablespoons of oil (using some of the oil from frying the chicken adds extra flavor) in a large pot. Add chopped onions and fry until they become soft. Then, add the tomato paste and continue frying over medium heat until the oil starts to separate from the paste, about 15-20 minutes…this step deepens the flavors. Next, add the boiled-down pepper and tomato mixture, fry for an additional 5 minutes.
Tip: Using plenty of onions adds depth, rich flavor, and a subtle sweetness to your Jollof rice, so don’t hold back!
Add the Stock and Spices: Season with bay leaves, curry powder, and thyme. Stir well and let the mixture simmer for a few minutes. Add the chicken stock and water, stirring until everything is well combined. Cover the pot and allow it to cook for 5 minutes.
Add the Rice: Rinse the rice thoroughly until the water runs clear to remove excess starch, then add it to the pot. Stir everything together, add water so that it is just slightly above the level of the rice.
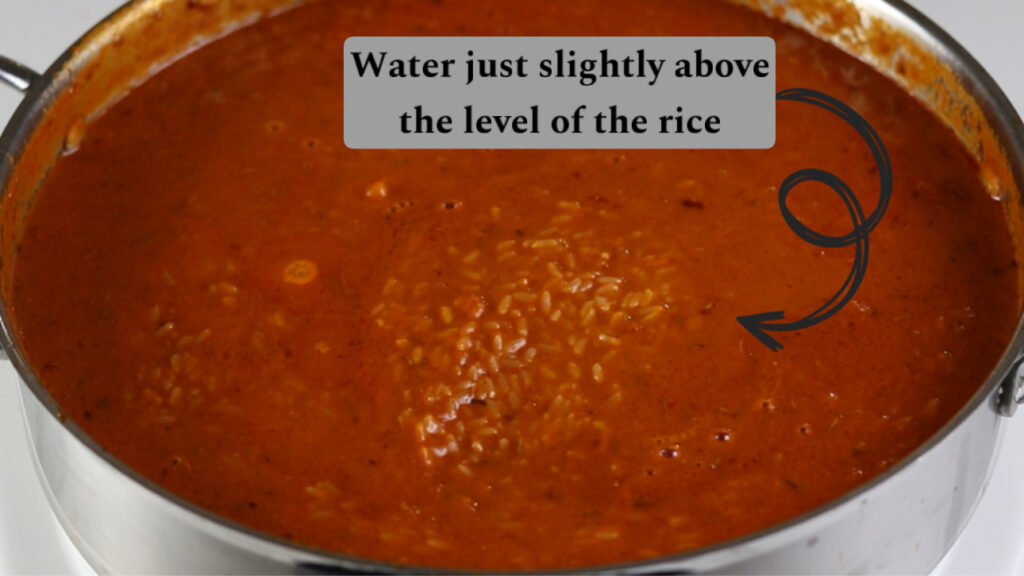
Cook: Cover the pot with foil or a tight-fitting lid to lock in the steam, and let the rice cook undisturbed for about 30 minutes. For party-style Jollof, start by cooking on low heat for 10 minutes, then increase the heat and cook for an additional 20 minutes to get that smoky flavor. For regular Jollof (without the smoky taste), cook on low heat for about 30-40 minutes.
The aluminum foil seals the rice and traps the steam so it cooks with little water and doesn’t come out sticky.
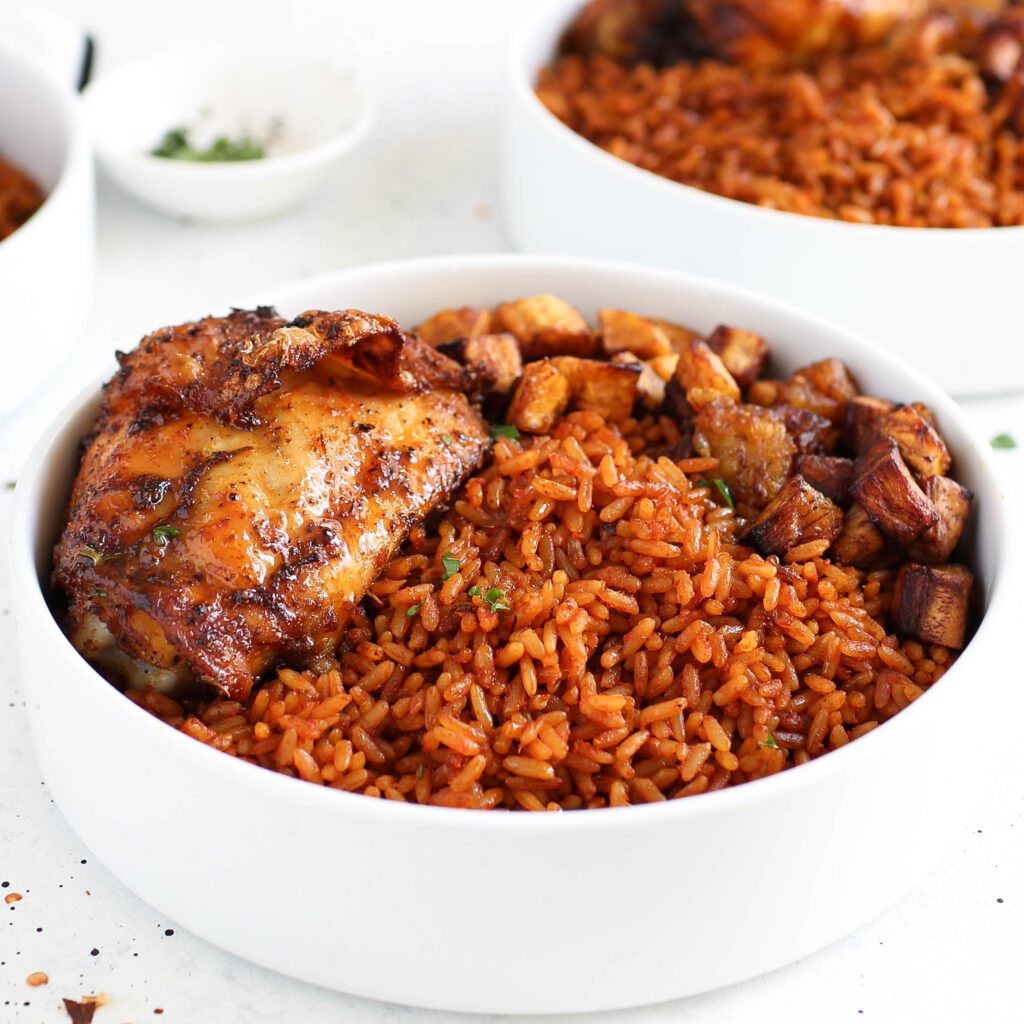
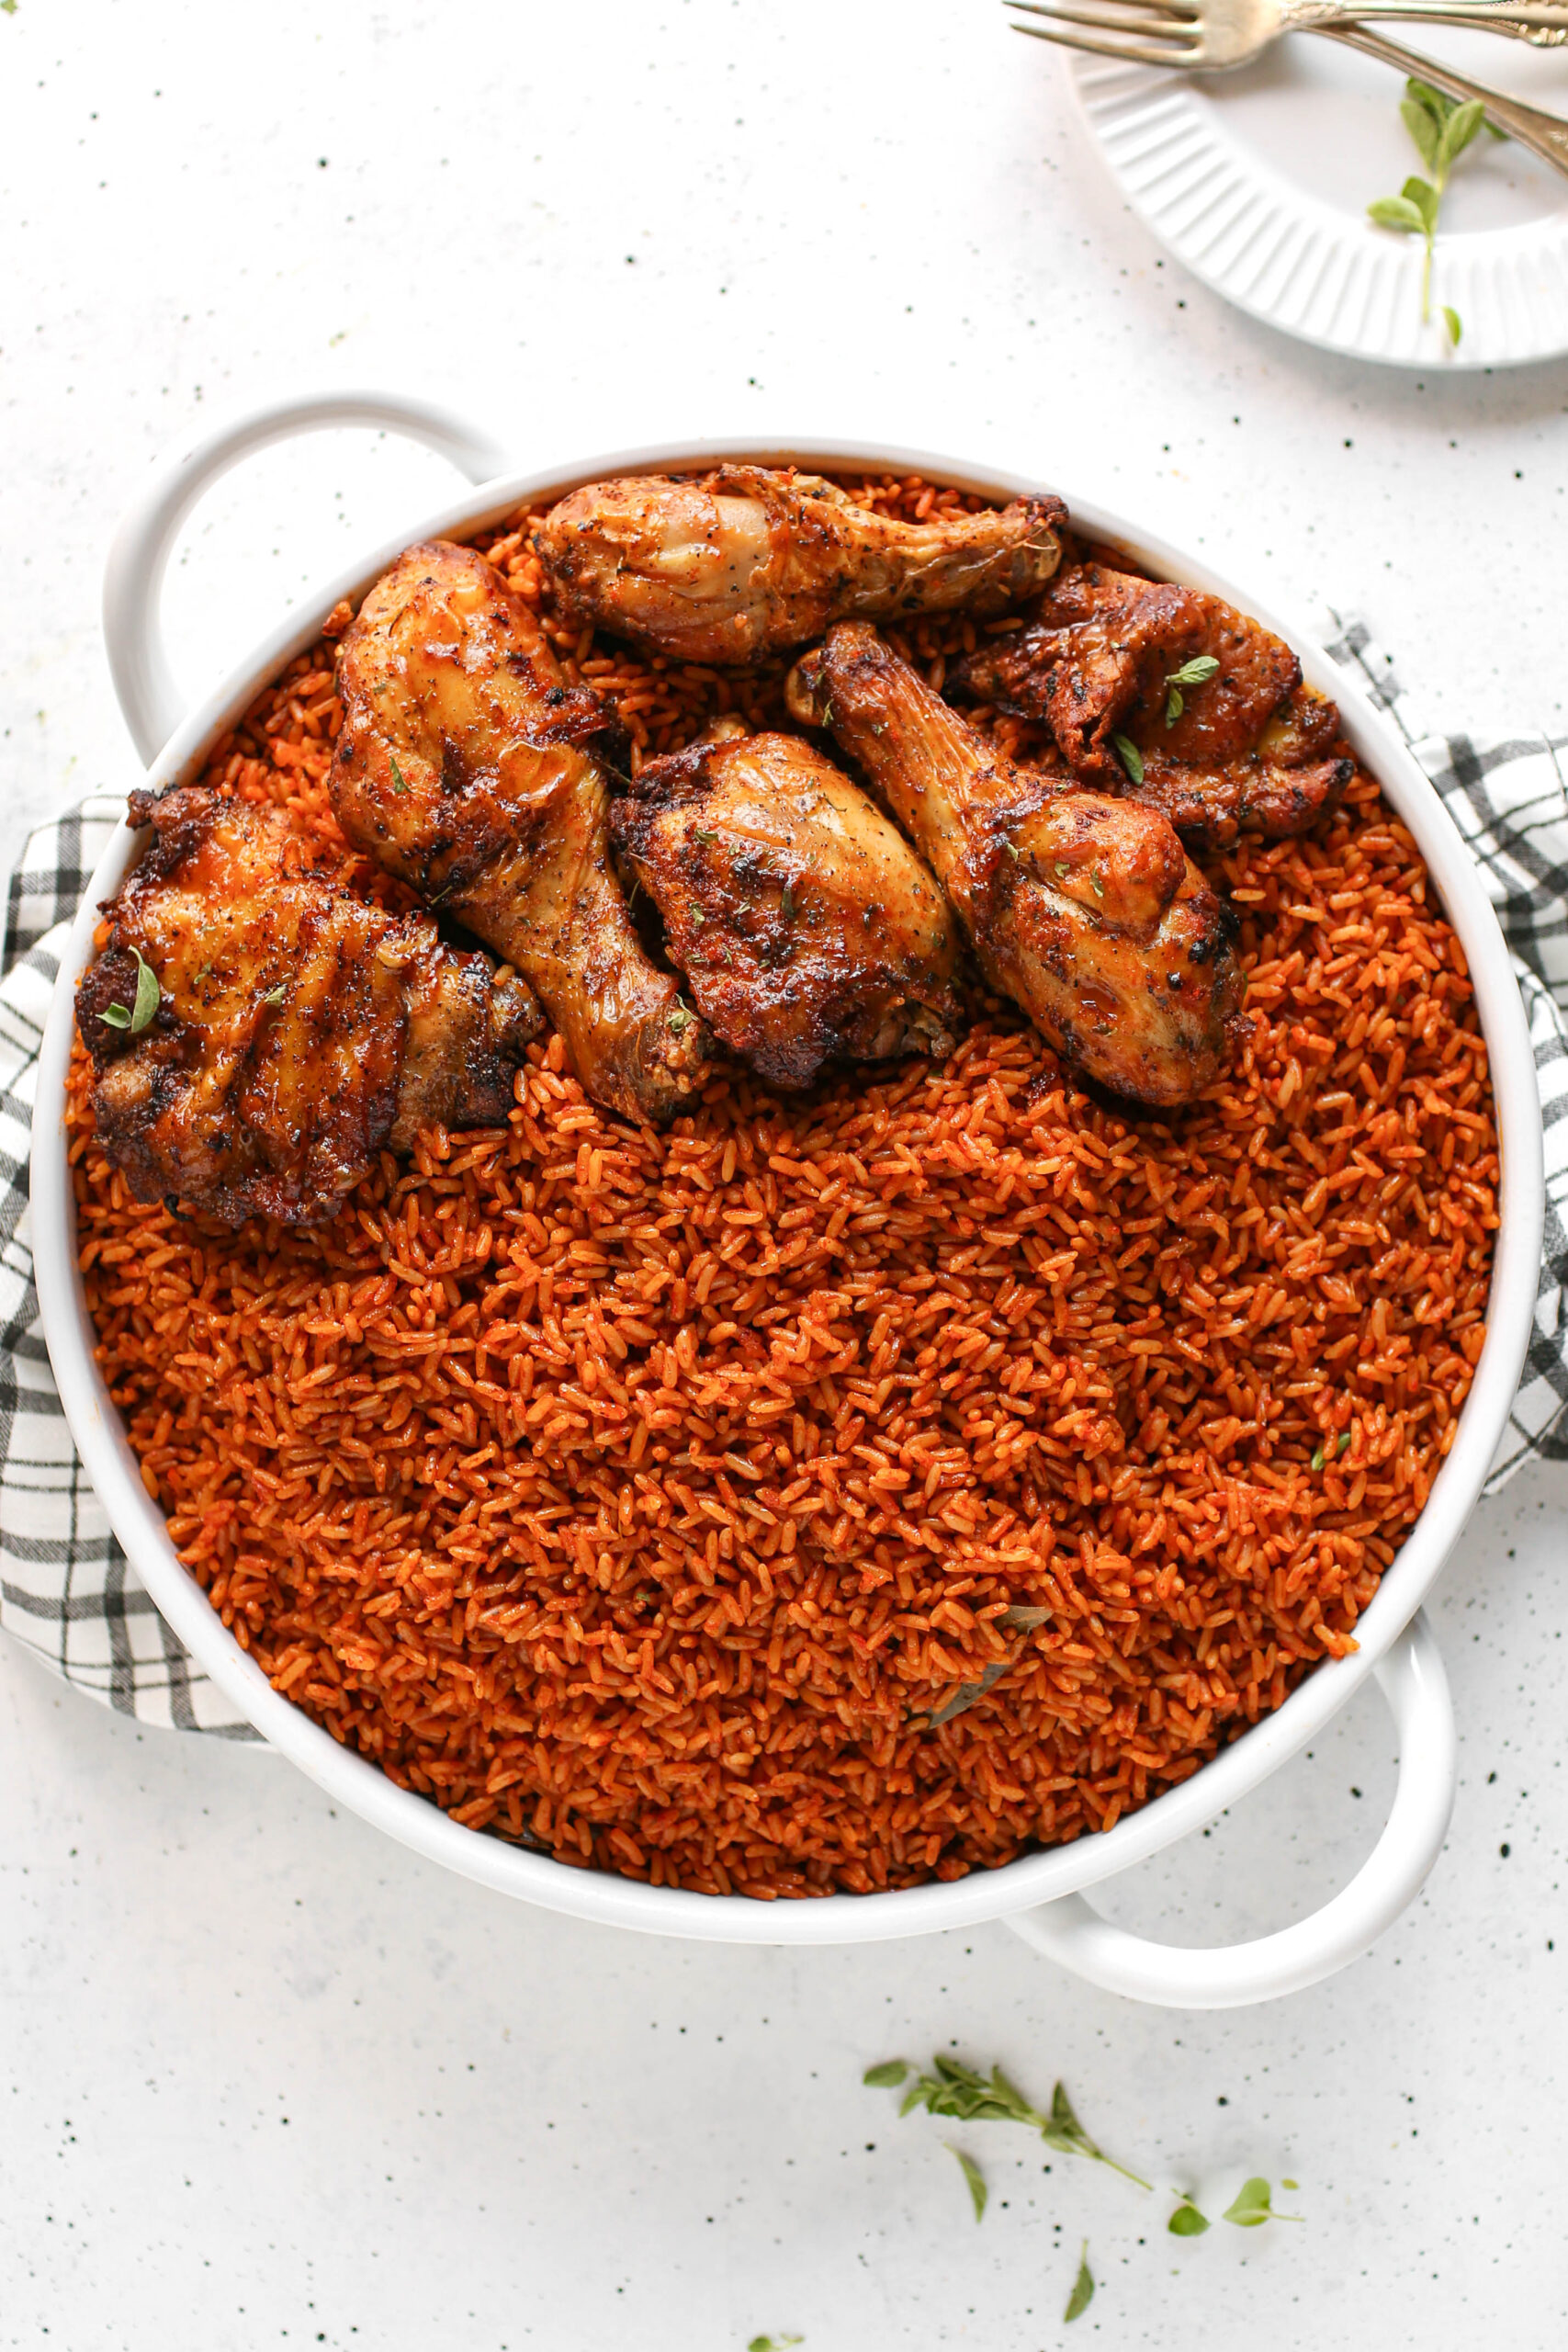
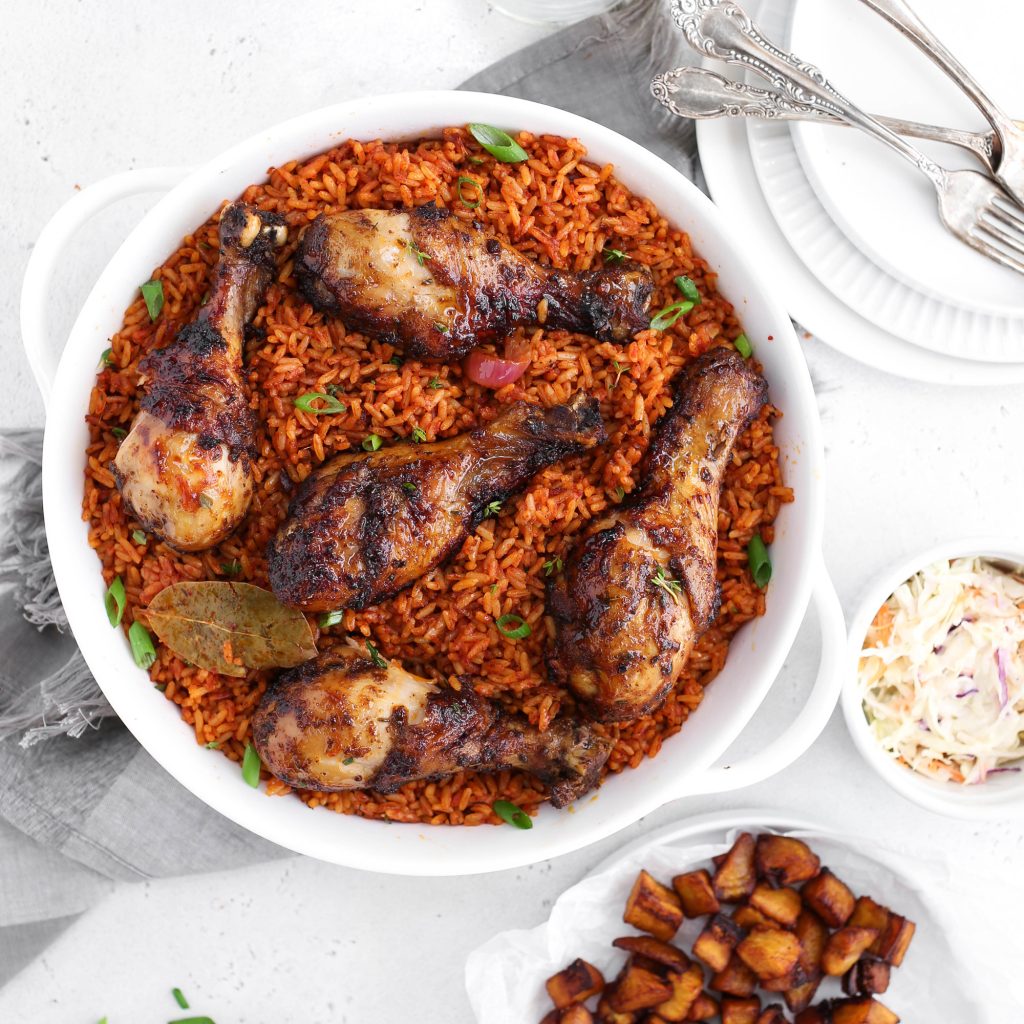
Serve the Jollof rice with fried plantains, and the fried meat.
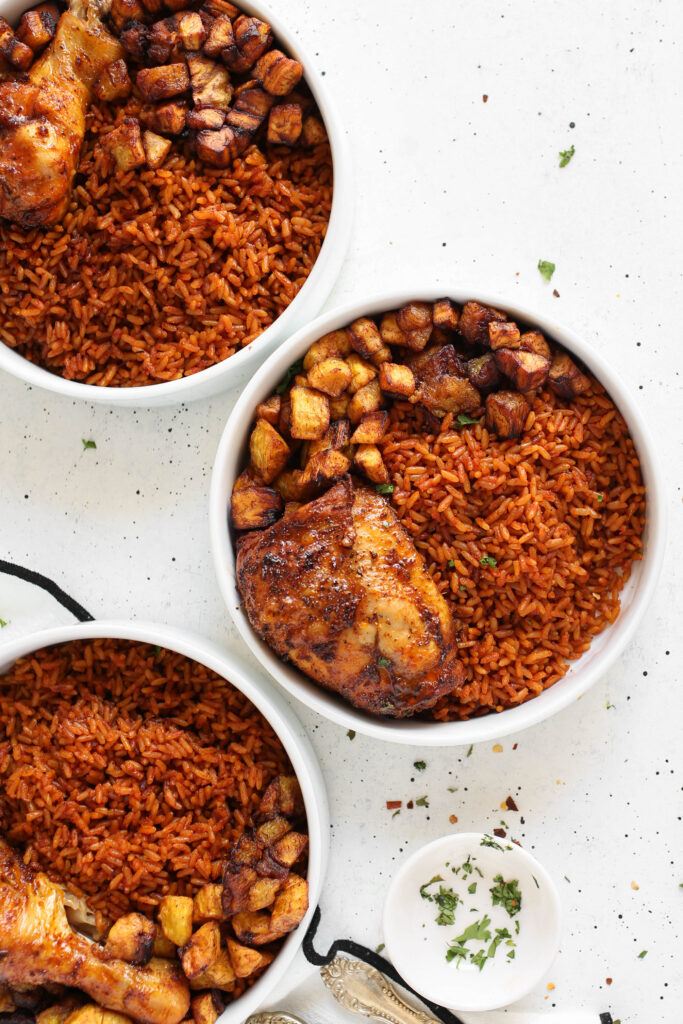
How to serve Jollof
Nigerian Jollof Rice is delicious on its own, but traditionally, it’s served with a range of tasty sides and proteins that make it truly special. Fried or grilled chicken, goat, or beef are classic choices that complement the smoky and savory flavors of Jollof. Fried plantains, known as dodo, add a sweet touch that balances beautifully, while moi moi (steamed bean pudding) offers a soft, flavorful contrast.
You can also add coleslaw or a fresh salad or sautéd vegetables for a refreshing addition.

What type of pot to make nigerian Jollof rice
For authentic Nigerian Jollof, the right pot makes a huge difference in both flavor and aroma, especially if you’re aiming for the rich, smoky taste of “party Jollof.” This style is famous for its slightly charred bottom part, which creates its signature smoky flavor. Here’s a guide to the best pots to help you achieve perfect Jollof rice.
Koko Irin (African Iron Pot): The Koko Irin pot is ideal for Jollof rice because of its excellent heat retention and even distribution, which creates that signature smoky aroma. This pot is especially great for making large batches and perfect for “party Jollof.” However, the Koko Irin can be hard to find outside Nigeria, so a cast iron pot is the next best option.
Cast Iron Pot: Think of it as a smaller, more refined version of the koko irin. Whether enamel-coated or uncoated, cast iron pots also help develop the smoky flavor typical of “party Jollof.” For a rich, smoky taste, this pot is a top choice.
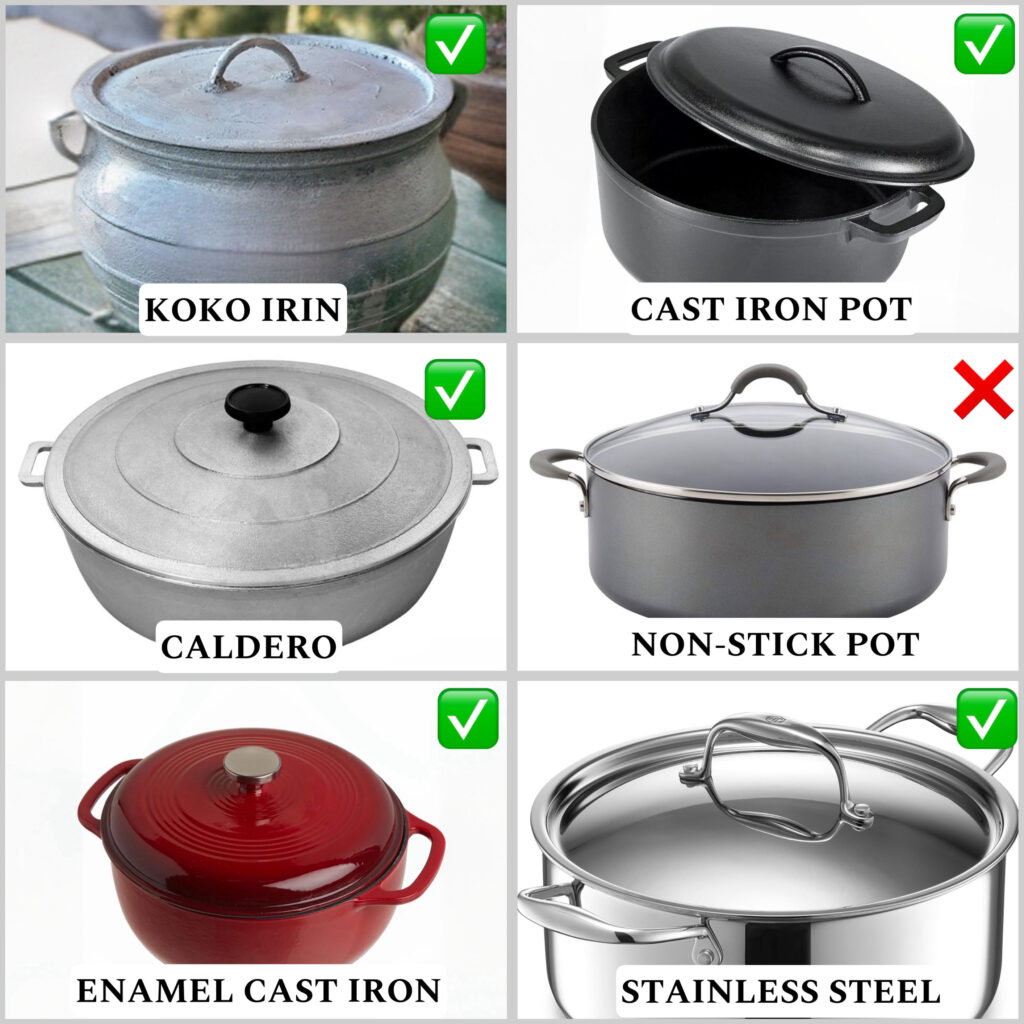
Caldero (Aluminum Pot): A traditional pot used in Colombian and Latin American cooking, the caldero is similar to a cast iron pot but lighter. It is also great for Jollof rice. Calderos are usually made of aluminum and they come in so many different sizes.
Stainless Steel Pot: These are a good option for cooking Jollof rice. While they don’t retain heat as well as cast iron or caldero, they’re still a solid choice and safe for high-temperature cooking.
Non-Stick Pot: I don’t usually recommend non-stick pots for Jollof rice. The coating prevents the rice from sticking to the bottom, which means you’ll miss out on that smoky flavor that makes Jollof unique. Non-stick pots also don’t retain heat as well, so the rice may cook less evenly. However, if you prefer a milder taste without the smokiness, a non-stick pot on low heat can work well to prevent burning.
How to Clean a Jollof Pot
It’s normal for Jollof rice to burn, especially when aiming for that classic smoky, party-style flavor. Cleaning can seem challenging, Here’s an easy method to clean your pot:
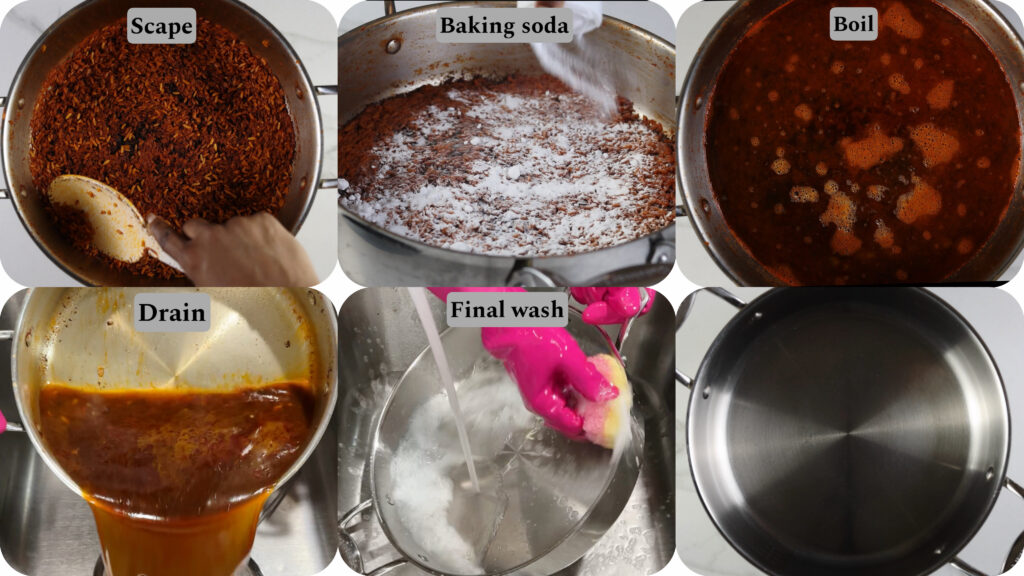
- Scrape out any remaining edible rice.
- Sprinkle about 1/4 cup of baking soda in the pot.
- Add a few drops of dishwashing soap.
- Pour in enough cold water to cover the bottom.
- Bring the pot to a boil (leave uncovered to prevent foaming over).
- Boil for 15-20 minutes until the burnt parts start loosening.
- Gently scrape the bottom with a spatula to remove any remaining residue.
- Turn off the heat and let the pot sit for about an hour.
- Once cool, discard the water and burnt bits.
- Finish washing with soap and a sponge.
- This method should leave your pot clean and ready for your next batch!
Frequency asked questions
Click on the question to read answer
Why is my Jollof rice sticky?
Sticky Jollof rice can happen if the rice isn’t washed properly or if you cook with too much water. Rinse the rice thoroughly until the water runs clear, and only add enough water to barely cover the rice. This helps achieve the perfect, fluffy texture.
Why is my Jollof rice dry?
Dry Jollof rice usually means it didn’t get enough water or oil during cooking. To fix this, after the rice is cooked, add a bit of butter(1/2 – 1 stick), chopped onions, and chopped tomatoes. Cover tightly and let it steam on low heat for about 10 minutes. This will help create a moist, flavorful Jollof.
Should I parboil my rice for Jollof?
No, parboiling is not necessary for Jollof rice. When you parboil the rice, it doesn’t get enough time to fully absorb the flavors of the sauce, which affects the taste. Instead of parboiling, wash the rice thoroughly until the water runs clear to remove excess starch and prevent stickiness. Tip: if you’re washing with hot water, finis rinsing with room temperature water so the rice doesn’t start steaming or getting soft.
Why is my Jollof rice hard? / why is my jollof rice still hard?
Hard Jollof rice usually means it hasn’t absorbed enough water or wasn’t cooked long enough. To fix this, add a little more water just enough to steam. If the rice has started burning, transfer it to a different pot before adding water, as adding water to burnt rice can ruin the taste. Cover the pot tightly with foil or a tight lid, and let it cook on low heat to soften without becoming mushy. Hardness can also be as a result from using poor-quality or mixed rice, which may not cook evenly.
Why is my Jollof rice bitter?
Bitter Jollof rice can result from undercooked or excessive tomato paste, burnt ingredients, or bitter peppers. To avoid this, follow the recipe closely and thoroughly fry the tomato paste to reduce acidity. When using tatashe (local red bell peppers), remove the seeds and veins, as these can add bitterness. Cook on low to medium heat, to prevent burning.
Why is my Jollof rice mushy?
Mushy Jollof rice is often caused by too much water, overcooking, or excessive stirring. To prevent this, use just enough water to barely cover the rice and avoid frequent stirring, as this can break down the grains and make the rice mushy. For the best texture, use long-grain parboiled rice.
Why is my Jollof rice not red?
To get the perfect rich red color, use the right amount of tomato paste and shop for ripe, vibrant red bell peppers and tomatoes. Tip: the color of your Jollof after mixing, just before covering to cook, will be similar to the final color. If it looks too pale, a quick fix is to add a touch of paprika or smoked paprika for extra color.
Can I make Jollof without tin tomatoes/tomato paste?
Yes, you can make Jollof rice without tomato paste. Though tomato paste enhances color and brings a richer tomato flavor, you can achieve a similar result with fresh, ripe tomatoes and red bell peppers (or tatashe) for both color and taste. Simply increase the quantity of tomatoes and peppers from the usual recipe, then cook the blend thoroughly to reduce excess moisture, frying well to deepen the flavor. If you’d like an extra boost in color, adding a touch of paprika can also help.
Why is my Jollof rice burning before it’s cooked?
It’s in the nature of Jollof rice to burn slightly, especially for that smoky flavor. However, if it’s burning too much at the beginning, try using lower heat. For regular Jollof without any burn, cook on very low heat.
Why is my Jollof rice tasteless?
Tasteless Jollof rice can result from inadequate seasoning. To avoid this, season your base and the rice generously with salt, spices, and bouillon cubes to taste, Also make sure to use homemade stock instead of store-bought stock as it adds a more natural depth and richness to the jollof.
Why is my Jollof rice mushy?
Mushy Jollof rice is often caused by too much water, overcooking, or excessive stirring. To prevent this, use just enough water to barely cover the rice Avoid frequent stirring, as this can break down the grains and make the rice mushy. For the best texture, use long-grain parboiled rice.
watch how to make it
Jollof rice

Ingredients
For the chicken
- 1500 g chicken thighs about 3 medium
- Handful of onion
- thumb-sized ginger peeled
- 2 garlic cloves smashed
- 1 tsp thyme or fresh thyme sprigs
- 1 tsp curry powder
- 1 tsp salt
- 2 teaspoons crushed chicken bouillon cubes
- ½ cup water
For the Tomato Sauce
- 6 medium tomatoes (600g)
- 3 large bell peppers (550g)
- 1-2 scotch bonnet peppers
- ½ small red onion
- 1 bulb garlic (optional)
- Few sprigs thyme (optional)
For the Rice
- 6 cups long-grain parboiled rice rinsed
- ½ cup oil
- ½ cup chopped onion
- 12 oz tomato paste (327g)
- 1½ cups blended tomato sauce (410g)
- 2½ tsp salt
- 1 tsp crushed bouillon chicken cube
- 1 tbsp dried thyme
- 2 bay leaves
- 1 tbsp curry powder
- 2 cups chicken stock
- 2 cups water
Instructions
Prepare the Chicken and Stock
- Season the chicken with chopped onions, ginger, crushed garlic, thyme, curry powder, salt, and crushed bouillon cubes.
- Mix well, cover, and let the chicken cook on low heat for 10 minutes (see note 1).
- After about 10 minutes, add water and let the chicken simmer a bit longer to create a rich stock.
- Once the chicken is cooked, remove it and strain the stock.
- Pour enough oil into a pan or pot and heat it over medium-high heat.
- Carefully add a few pieces of chicken to the hot oil without overcrowding the pan. For maximum flavor, toss in half an onion with the root still intact.
- Fry the chicken in batches until golden brown, then transfer to a paper towel-lined plate to drain any extra oil (see note 2).
Make the Tomato Sauce
- Cut the tomatoes, bell peppers, onions, and garlic into smaller pieces, leaving the garlic in its shell to prevent burning.
- Place the vegetables in an oven-safe dish and roast at 400°F (200°C) for about 30 minutes, turning halfway through.
- Once roasted, transfer the vegetables to a blender, squeeze out the garlic, and blend everything to a smooth paste (see note 3).
Cook the Jollof Rice
- In a large pot, heat up some oil over medium heat. Add the chopped onion and fry until softened
- Add the tomato paste and fry until it darkens and the oil begins to separate, about 15 minutes.
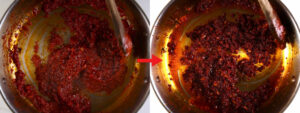
- Add the tomato sauce, salt, bouillon, thyme, bay leaves, and curry powder. Mix well.
- Pour in the chicken stock and water, stir well, cover, and let it cook for about five minutes. If you do not have enough chicken stock, add more water.
- Add the rinsed rice (see note 4) and the remaining water (the water should be just slightly above the rice).
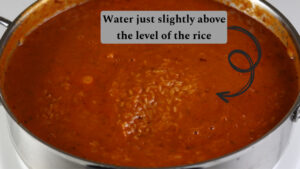
- Stir to combine, then cover tightly with foil or a lid to trap the steam (see note 5).
- Cook on medium heat for 25 minutes. Then reduce heat and continue cooking for about 5–10 more minutes (see note 6).
- Once done, mix the rice thoroughly and serve with fried chicken, plantains, coleslaw, or a fresh salad.
Notes
- Letting the chicken cook without added water initially helps intensify its flavor. After about 10 minutes, add water to create a rich stock.
- Frying the chicken is optional. For a lighter version, bake or air-fry the chicken at 375°F (190°C) until golden.
- You can also blend the tomato-pepper mixture and cook it over medium heat until it reduces to a thicker consistency (about 40 minutes). Add more oil if needed and keep stirring to prevent the tomato paste from burning.
- Wash the rice several times until the water runs clear. This prevents the rice from becoming gummy or sticky. Use room-temperature water for the final rinse to prevent the rice from starting to cook prematurely.
- Covering the pot tightly with foil or a lid traps the steam, allowing the rice to cook with minimal water.
- To get the smoky “party Jollof” flavor, cook the rice on high heat letting it slightly burn at the bottom.
Tips for perfect jollof
Cooking Technique:- Use a cast iron pot for authentic Nigerian Jollof flavors, especially if you’re aiming for the smoky taste of “party Jollof.”
- Use long-grain parboiled rice, as it holds up well during cooking and absorbs the sauce without becoming mushy. Sella basmati is another good choice, but avoid sticky varieties like jasmine.
- When making the tomato sauce using the boil-and-reduce method, add the crushed/chopped tomatoes first when blending. Due to the high water content, you’ll need minimal water to blend the rest.
- Avoid stirring the blended tomato and pepper mixture once it’s in the pot to prevent splattering. If it does start splattering, cover slightly ajar so the steam can evaporate.
- Let the meat cook first without added water to concentrate its flavor before adding water to create a stock.
- Add onions generously when frying, as they add sweetness and depth.
- Use part of the oil used in frying the chicken (if frying) to make the rice.
- For peppers, reduce spice by removing the seeds and veins.
- Fry the tomato paste well before adding the blended sauce. Look for the oil to separate from the paste, which prevents the bitter or sour Jollof taste.
- After adding the rice, make sure the water level is just above the rice, and cover tightly with foil to trap the steam. This helps the rice cook evenly without becoming sticky.
- To get the smoky “party Jollof” flavor, cook the rice on high heat, letting it slightly burn at the bottom.
- Rinse the rice thoroughly before cooking to remove excess starch, which can make the rice sticky.
- Use foil to seal the pot tightly, helping the rice steam and cook without needing too much water. This method prevents mushiness.
- If the rice isn’t red enough, add paprika or smoked paprika.
- For dry Jollof, add a touch of butter, onions, and tomatoes to reintroduce moisture and flavor.
- Ensure that the tomato paste is well-cooked, and remove seeds from the peppers to avoid bitterness.
- If the rice is still hard after cooking, add a little more water just enough to steam. If the rice has started burning, transfer it to a different pot before adding water, as adding water to burnt rice can ruin the taste. Cover the pot tightly with foil or a lid, and let it cook on low heat to soften without becoming mushy.
- Use the same pot for cooking the rice to boil down the tomatoes.
- Use the pot used in frying the chicken to make the Jollof.
- Cleaning the Pot: For burns, sprinkle baking soda and dish soap in the pot with water. Boil for 15-20 minutes to loosen burnt bits, makes cleanup easier.
Did you make this recipe?
Tag, mention or DM @kikifoodies. I would love to hear from you!
Amazing recipe and thanks for sharing the cleaning tips for the pot.
Those recipe can never go wrong in the right hands.
This recipe is the best
Will be trying this soon. Thank you for your tips.
Am yet to try it but next time rise your voice thank you for the nice recipe
From Malawi
Most delicious
I followed the recipe step by step and I was in love with the results.
Amazing recipe. Thank you kikifoodies
So detailed. Love it
So detailed and clear. Thank you for this, will be trying it out soonest
Thanks for always providing easy to replicate contents
Very detailed. Can’t wait to try this
Very detailed, thank you for putting this together, God’s blessings always
I’ve been following and learning from your incredible recipes for over a year now and I want to say a big thank you chef, you’re amazing and so are your content❤️
Love love your recipes and videos especially the bread you make❤️
Kiki you are the best.
A very detailed recipe plus how to wash pot? Like who does that? Only KIKI❤️
I really love how detailed it is. This is a must try for me. Thank you so much ma for dishing out value always
Fantastic recipe and great tips
Your recipes are always a delight to “watch” will definitely try !
Very detailed teaching, definitely trying it soonest
I tried this and it turns out great I absolutely loved it keep up the good job
Oh my God! From the way every single step is well detailed to the visuals. Chef kiss. Well done ma’am. It’s nice having this recipes at my beck and call.
Thank you so much
You are a good tutor and person. You don’t hide knowledge instead you share it for the benefit of humanity.
Even though, I cook very well for myself and family yet, your recipes has taken my cooking to an advanced level. Thank you.
This jollof rice was HEAVENLY!!! my mom and my brother also loved it a lot! I have always trusted your recipes and would watch the video from time to time, your food always look delicious! I just made your jollof 3 days ago and not even up to a week, it was gone! It’s so delicious, sweet and smoky! I will be using this step to cook my rice anytime! I have never been so proud of how it turned out! Thank you for this recipe!
This is really commendable and really helpful. I’ll be sure to test it out
Gracias
This is really helpful. I really enjoy your cooking. I’m so excited to try it out. Thank you
This was really helpful and I must say this, leaving everything behind just to watch your recipe always worth it
Weldone ma’am
Great recipe and clear instructions. I loved the serving suggestions as well. Everyone at my dinner loved it.
This is amazing thank you so much !
This very well detailed Definitely trying it.
Thank you so much❤️
Thanks for sharing
I always enjoy trying your recipes
Thank you so much.
Kiki’s recipes never misses
This is the perfect Jollof recipe!
You really put the work in here. The tutorial is one worth sharing. I love your recipe and tips for cooking and the tools. 10 STARS!!!!
Perfect!
This recipe is so well detailed and educative enough
Thank you so much
You’re welcome.
Kiki’s recipes are always a hit back to back, the jollof is a banger anyday
Kikifoodies’ jollof recipe is a game changer. I was able to perfect my jollof recipe by using the right type of rice (in the US). I recommend that her page be your go to for jollof and other recipes!
Good job!!!
Jollof has always not been my strong point, so I avoid making it as much as possible because it doesn’t always come out right.
I am definitely trying this recipe this weekend. Always excited to try your recipes. Definitely excited for this.
Also, I really love the way you explained everything in details, even giving extra tips. Thank you soo much
Hi Kiki,
I dropped a comment over some weeks ago about jollof rice not being my strong point and how I intended to try your recipe… The jollof was a hit back to back.. It had high praises from my husband. It was definitely a confidence booster
I am actually typing this from my kitchen, about to make another pot of Jollof rice using this same recipe. Lol
Proud to say I will be able to flex my muscle of perfect jollof this Christmas.
Thank you very much kiki
This make me so happy. Thank you so much.
You’re absolutely welcome. Let me know how it turns out okay?
Kiki is simply the best in this cooking thing in my opinion.
wonderful recipe as always i expect nothing less from kikifoodies
Very detailed and the clear pictures makes you understand perfectly and want to try out yours
Thank you so much Mmesoma. I glad to see you here
This is a beautiful recipe as always! Thanks for sharing Kiki❤️
Thank you!
You are simply the best,your voice and how you cook is extraordinary
Kiki taught me how to make the best jollof. I swear by her recipes.
Aww…Thank you so much Chi
Kiki taught me how to make the best jollof. I swear by her recipes.
Very detailed and short. I love you Kiki ❤️with you, cooking is made easy n simple
Seriously, one of the best jollof recipes I’ve ever tried! Recipe is super easy to follow and the end product is just as amazing.
I’m so happy you liked it.
You explain everything so well and easy to learn. And your food are always aesthetically pleasing!
Thank you kiki for this ❤️
You’ve always been an inspiration ✨️ ❤️
Your recipes are always timely, and I love how simple you make everything look
This recipe really helped me thank you
I’m so happy it was helpful