sardine rolls
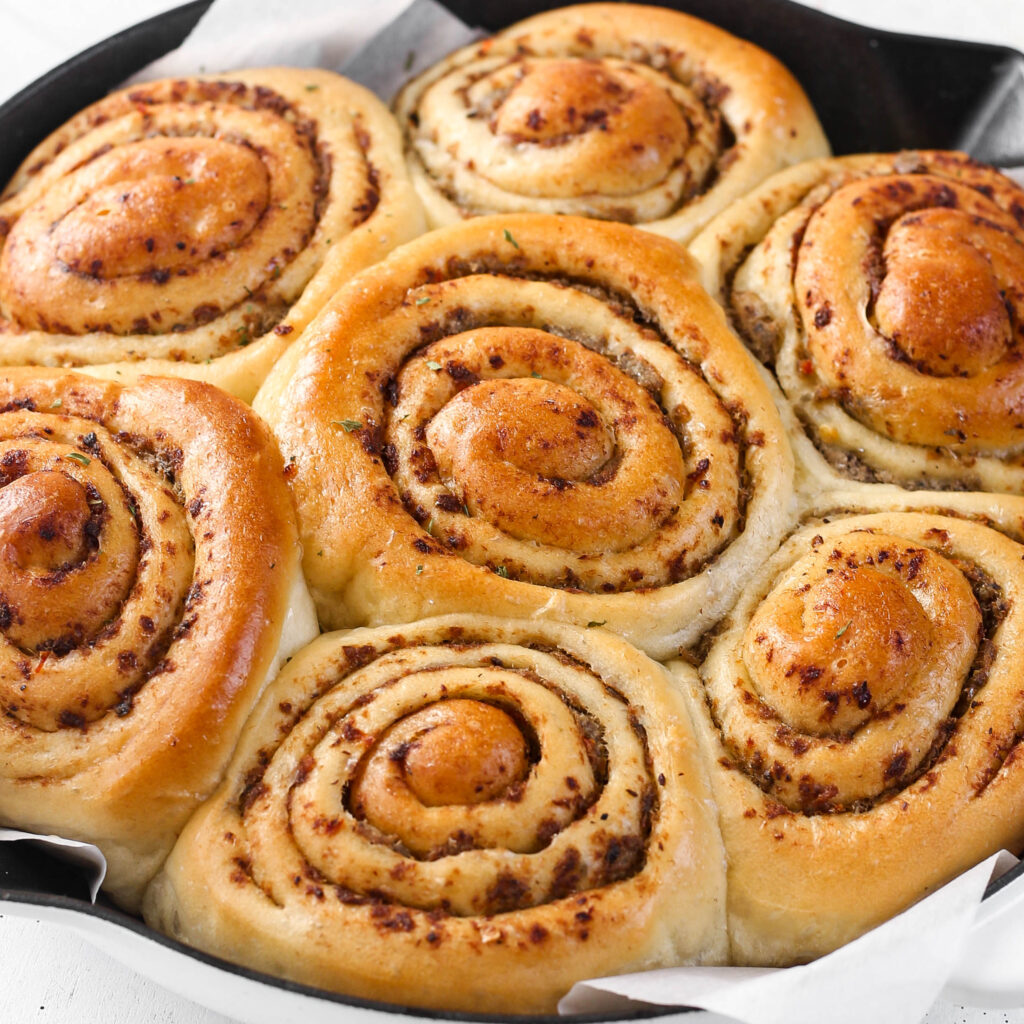
Soft, fluffy dough meets a rich, savory sardine filling in these irresistible rolls. The tender sardines, buttery richness, and a touch of spice create a perfect balance of flavor. Whether enjoyed as a snack, appetizer, or side, these rolls are comfort food at its best…simple, satisfying, and full of flavor
sardine rolls
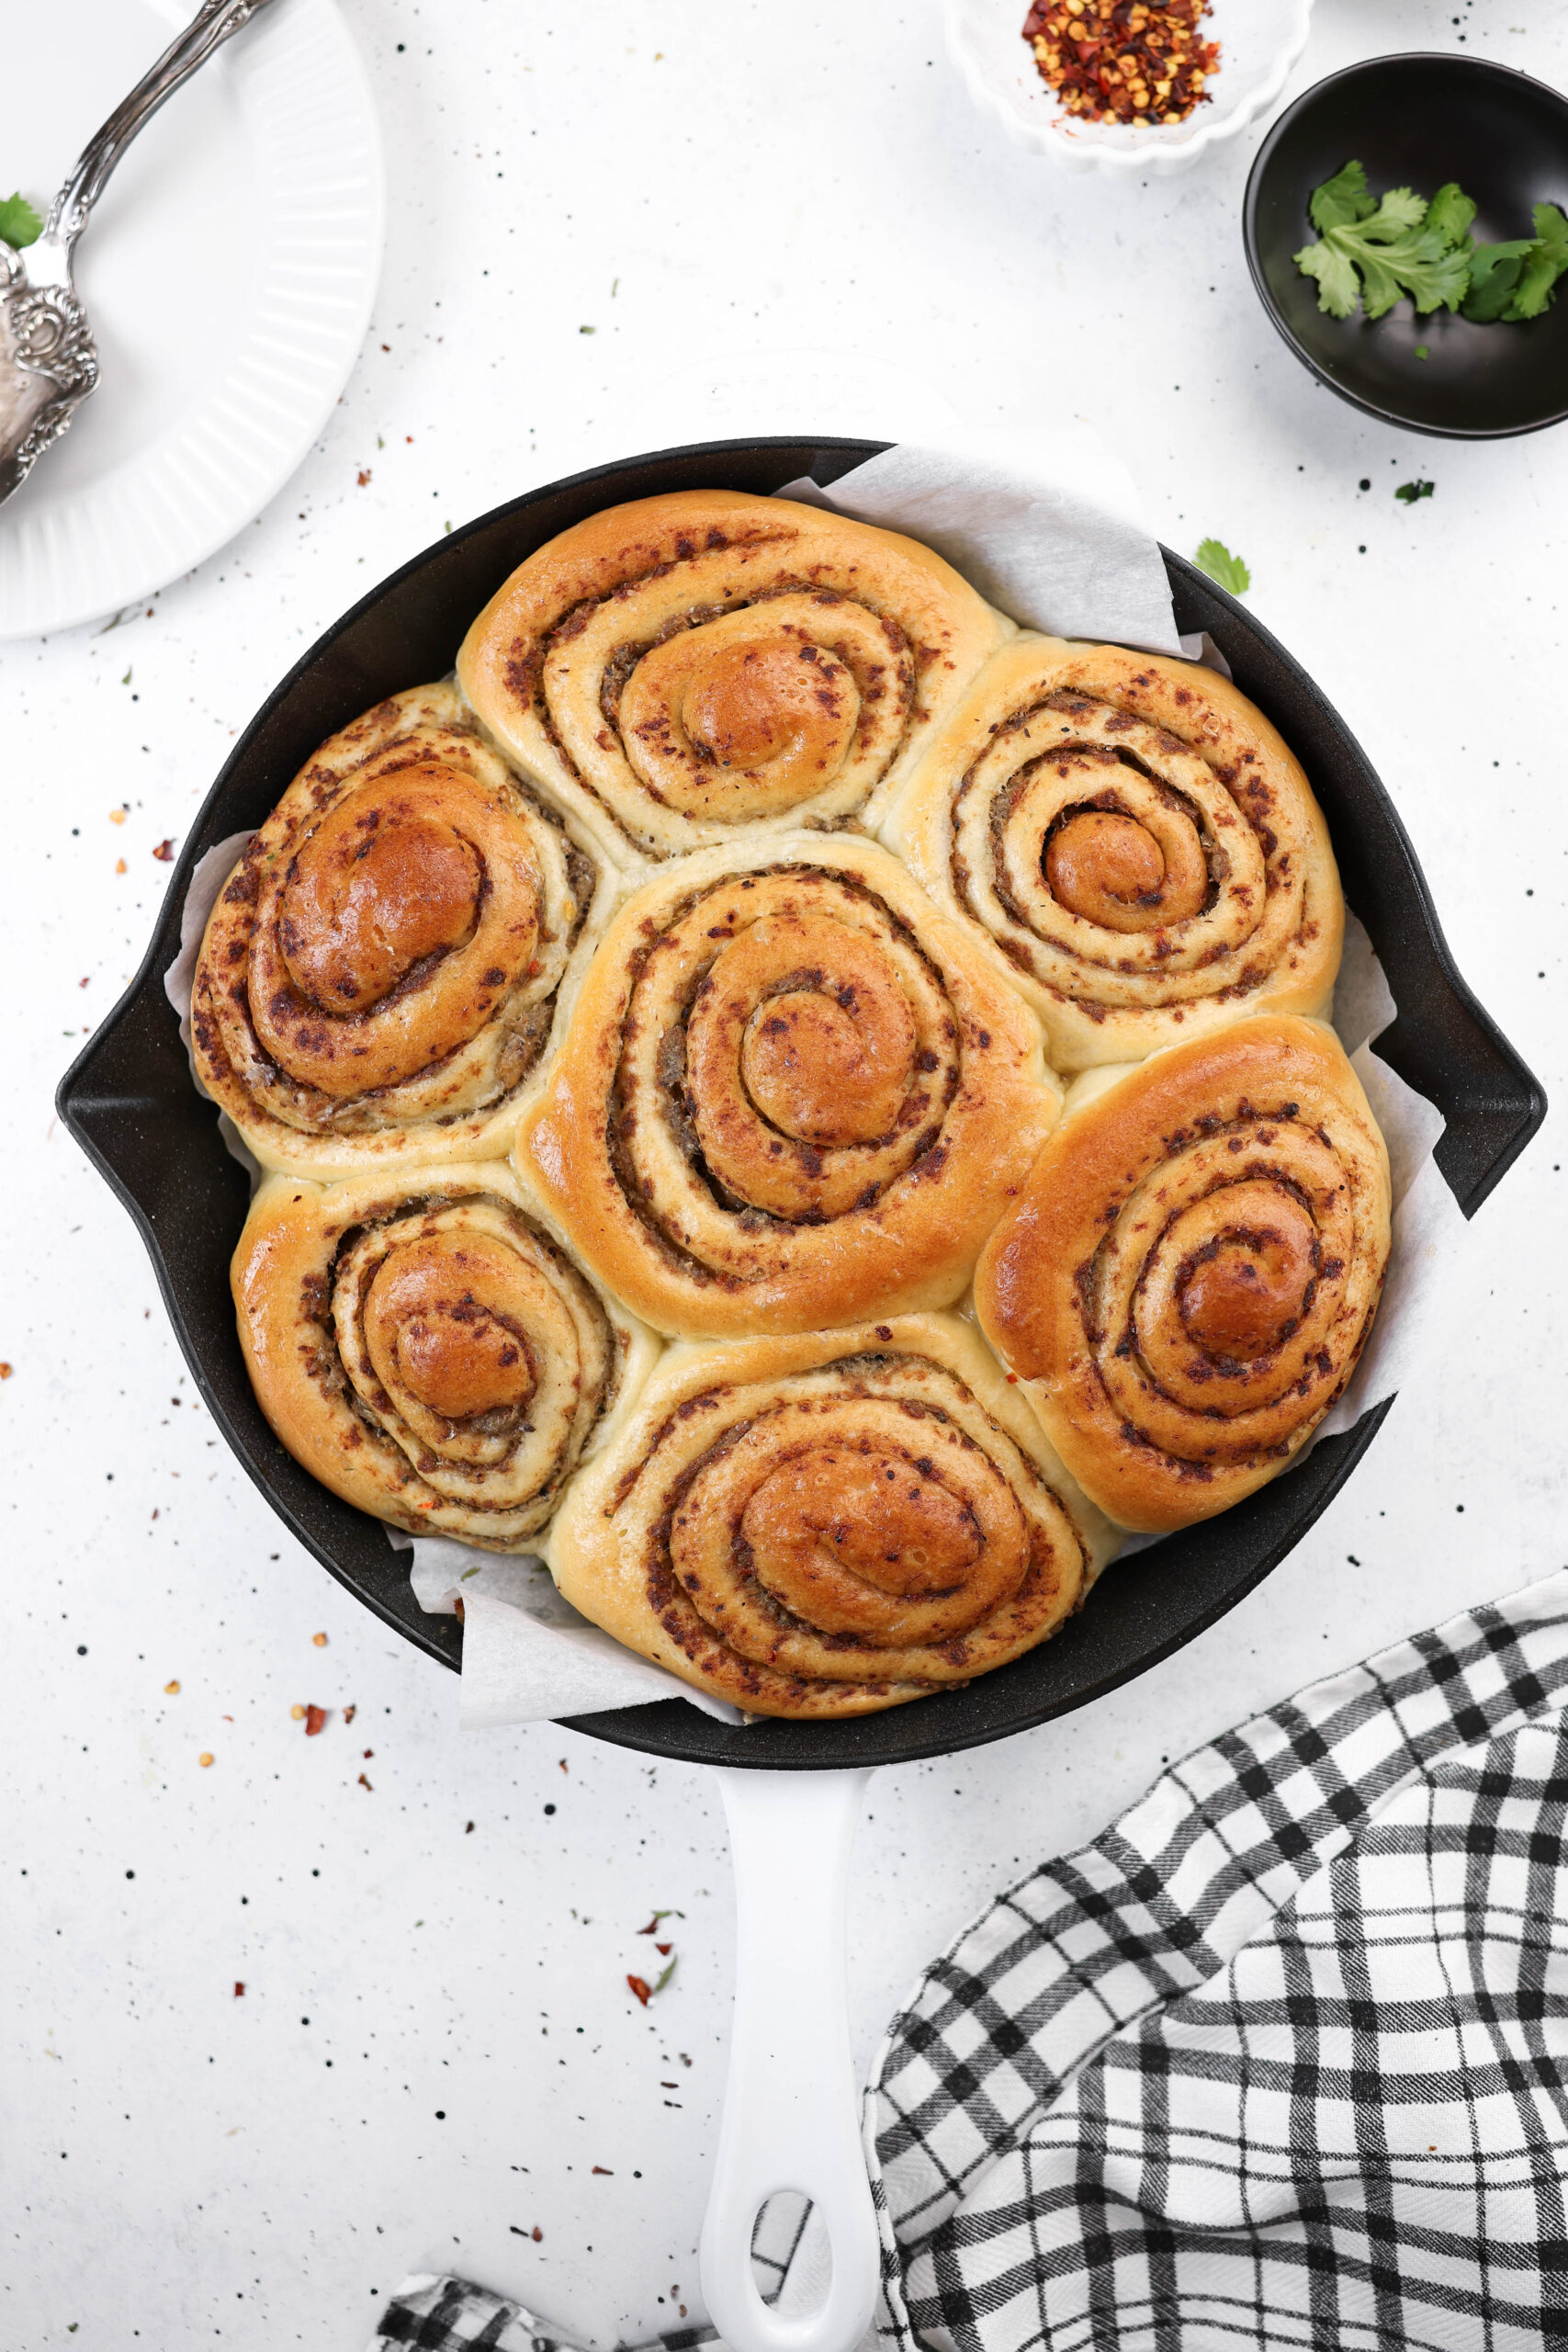
If you’ve ever doubted that sardines could steal the show, let me introduce you to these sardine rolls…soft, golden, and swirled with a savory filling that’s reel-y irresistible. They’re the perfect mix of comfort food and bold flavor, proving once and for all that sardines aren’t boring. Whether you’re serving them for breakfast, snack time, or as an appetizer, these rolls are bound to hook everyone’s attention.
What You’ll Need
Sardines: The star of the dish, sardines bring a rich, savory flavor that pairs beautifully with soft, fluffy bread. Their natural oils not only keep the filling moist but also infuse it with a smooth, luxurious texture. Plus, sardines are a powerhouse of protein, omega-3 fatty acids, and essential nutrients. Don’t have sardines? Canned tuna, mackerel, or salmon packed in oil make great substitutes.
Instant Yeast: For a no-fuss baking experience, instant yeast is the way to go. It eliminates the need for proofing, saving time without sacrificing results. If you prefer using active dry yeast, just remember to dissolve it in warm water for 5–10 minutes before mixing.
Bread Flour: Bread flour’s high protein content ensures a chewy, airy texture in your rolls by building a strong gluten structure. While all-purpose flour works as a substitute, it may result in less chewy rolls.
Water or Milk: Liquid is essential for hydrating the dough and activating the yeast. For a richer dough, replace some or all of the water with whole milk, 2%, or even evaporated milk mixed with water all work well.
Sugar: A touch of sweetness enhances the flavor of the rolls, feeds the yeast, and aids in achieving a golden-brown crust. Honey, maple syrup, or a sugar substitute like stevia can be used instead, but adjust the quantity to suit your taste.
Butter: Butter brings creaminess to the dough and helps bind the filling, ensuring it stays put during rolling and baking.
Oil: Using the oil from your canned sardines intensifies the flavor of the filling. If needed, you can swap it with a neutral-flavored oil.
Salt: enhances every ingredient’s flavor while helping regulate yeast activity for an even fermentation process.
Egg: add richness, structure, and a subtle lift to the dough, resulting in soft, pillowy rolls.
Pepper: A hint of pepper brings a gentle heat that complements the sardines’ savory depth. Feel free to adjust the amount or leave it out altogether if you prefer a milder taste.
Step-by-step Guide
1. Prepare the Dough
- I used instant yeast for this so activation not needed.
- In a large mixing bowl, pour room-temperature water or milk, add yeast, a cracked egg, sugar, flour, and sardine oil to the bowl. The Sardine oil will enhance the flavor and also contributes to a softer texture. You can substitute with regular oil.
- Mix the ingredients together thoroughly until they form a sticky dough. Transfer the dough to a clean work surface or rolling mat, and knead it for 8-10 minutes by hand, or for 6-8 minutes on medium speed if using a stand mixer.
- Shape the dough into a ball and place it in a lightly oiled bowl. Cover the bowl with plastic wrap, cling film, or a clean kitchen towel. Set it in a warm place to rise for about 1 hour or until the dough doubles in size.
2. Prepare the Filling
- Place the sardines on a wide plate and carefully remove the bones. Deboning ensures a smooth filling with no unpleasant surprises for anyone eating the rolls. If you like your sardine whole, you can mash it up that way.
- Mash the sardines with a fork, then mix in some softened butter and a bit of finely chopped pepper. The pepper provides a touch of heat to complement the sardine flavor. You can leave it out if you want.
3. Assemble the Rolls
- Once the dough has doubled in size, remove the covering and punch the dough down gently to release the air.
- This deflates the dough, making it easier to shape and make it rise evenly the second time.
- Transfer the dough to a clean, floured work surface or rolling mat. Dust the rolling pin with flour to prevent sticking.
- Roll the dough out into a rectangle about 1/2 to 1 cm thick. A uniform thickness ensures the rolls bake evenly.
- Spread the sardine mixture evenly over the dough, leaving about 1 inch (2-3 cm) of space around the edges.
- Leaving a border prevents the filling from spilling out when the dough is rolled.
Roll the dough tightly from one long side to the other, forming a log.
Mark the log into even portions using a ruler or your fingers to guide you.
- Cut the rolls using clean thread instead of a knife. Slide the thread under the log, cross the ends over the top, and pull firmly to slice through the dough.
Using thread prevents the dough from being squished or tearing, which can happen with a knife. It ensures clean, even cuts without disturbing the swirl. Arrange the cut rolls in a parchment-lined baking dish or cast-iron skillet, leaving a small gap between each roll to allow for expansion.
- Cover the dish with a clean kitchen towel and let the rolls rise again in a warm place until they double in size.
4. Bake the Rolls
- Preheat your oven to 350°F (175°C).
- Once the rolls have risen and doubled in size, bake them for 30 minutes, or until they are golden brown.
- Serve and Enjoy!
Let the rolls cool slightly before serving. They are best enjoyed warm.
Tips for making the best sardine rolls
- Check the label of sardines for the sodium level. Some sardines can be very salty, which might affect the overall flavor of your rolls. If you’re watching your salt intake, look for low-sodium varieties.
- Avoid sardines packed in a tomato-based sauce, as the tangy flavor can overpower your filling and alter the texture. Instead, choose sardines packed in oil, preferably olive oil, for a smoother, richer flavor.
- Even though canned sardines typically come with soft, edible bones, it’s best to remove them. Deboning ensures a smoother filling and eliminates any unwanted textures in your rolls.
- Properly kneaded dough will feel smooth and elastic. You can also do a “windowpane test”. You stretch a small piece of dough and if it stretches thin without breaking, it’s ready.
- Let the dough rise in a warm place : Yeast thrives in a warm environment, which speeds up fermentation. This allows the dough to rise properly and develop air pockets for a light, fluffy texture.
- Thread creates clean, easy and precise cuts without squishing the dough or disrupting the swirl of the filling. A knife may press down too hard, causing uneven slice.
- Keep the rolls from sticking to the pan by lining the pan with parchment paper or lightly grease it with butter or oil to prevent the dough from sticking and to make cleanup easier.
- Roll the log tightly to ensure the filling stays in place and creates a neat swirl in the finished rolls. Loose rolling might cause the filling to spill out.
Watch How to Make It
Equipment
- oven
Ingredients
DOUGH
- 1 cup water
- 2 ¼ teaspoons Instant yeast
- 500 g Bread Flour about 4 cups
- 50 g sugar 4 tablespoons
- 1 teaspoon salt 6g
- 2 tablespoon sardine oil you can mix with regular oil or melted butter
- 1 medium egg
FILLING
- 2 cans of sardine
- 1 tablespoon butter
- ½ bulb habanero pepper
Instructions
Prepare the Dough:
- In a large bowl, combine room-temperature water or milk, yeast, a cracked egg, sugar, flour, and sardine oil.
- Mix thoroughly until the ingredients come together to form a dough.
- Transfer the dough to a clean work surface or rolling mat, and knead it by hand for 8-10 minutes until smooth and elastic. (If using a stand mixer, knead on medium speed for 6-8 minutes.)
- Once the dough is smooth, shape it into a ball and place it in a lightly oiled bowl.
- Cover with plastic wrap, cling film, or a clean kitchen towel, and let it rise in a warm place for about 1 hour, or until it doubles in size.
Prepare the Filling:
- Place the sardines on a wide plate, remove the bones, and mash with a fork.
- Mix in some softened butter and a bit of chopped pepper until well combined.
Prepare the Rolls:
- Once the dough has risen, remove the covering and punch it down to release the air.
- Transfer the dough to a clean, floured work surface or rolling mat.
- Roll the dough out with a rolling pin until it is about 1/2 to 1 cm thick.
- Spread the sardine mixture evenly over the surface of the dough, leaving a small border around the edges.
- Roll the dough tightly into a log, ensuring the filling stays inside.
- Mark evenly spaced portions on the top of the dough for precise cutting.
- Use clean thread to cut the rolls: slide the thread under the log, cross the ends over the top, and pull firmly to slice through the dough.
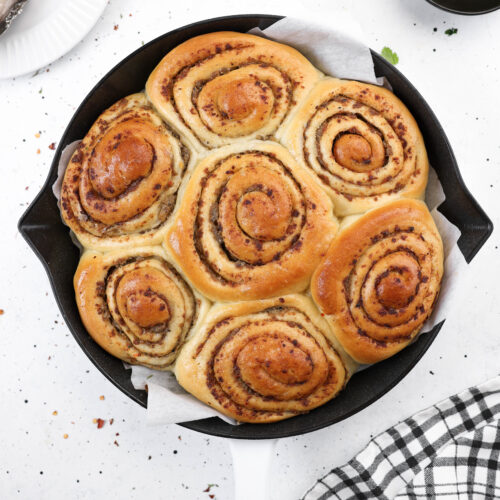
- Arrange the rolls in a baking dish or cast-iron skillet lined with parchment paper, leaving some space between each roll.
- Cover with a clean kitchen towel and let the rolls rise again until doubled in size.
Bake the Rolls:
- Preheat your oven to 350°F (175°C).
- Once the rolls have risen, bake them for 30 minutes, or until golden brown.
- Serve and Enjoy!
Notes
Did you make this recipe?
Tag, mention or DM @kikifoodies. I would love to hear from you!
