Soft and Buttery Dinner Rolls
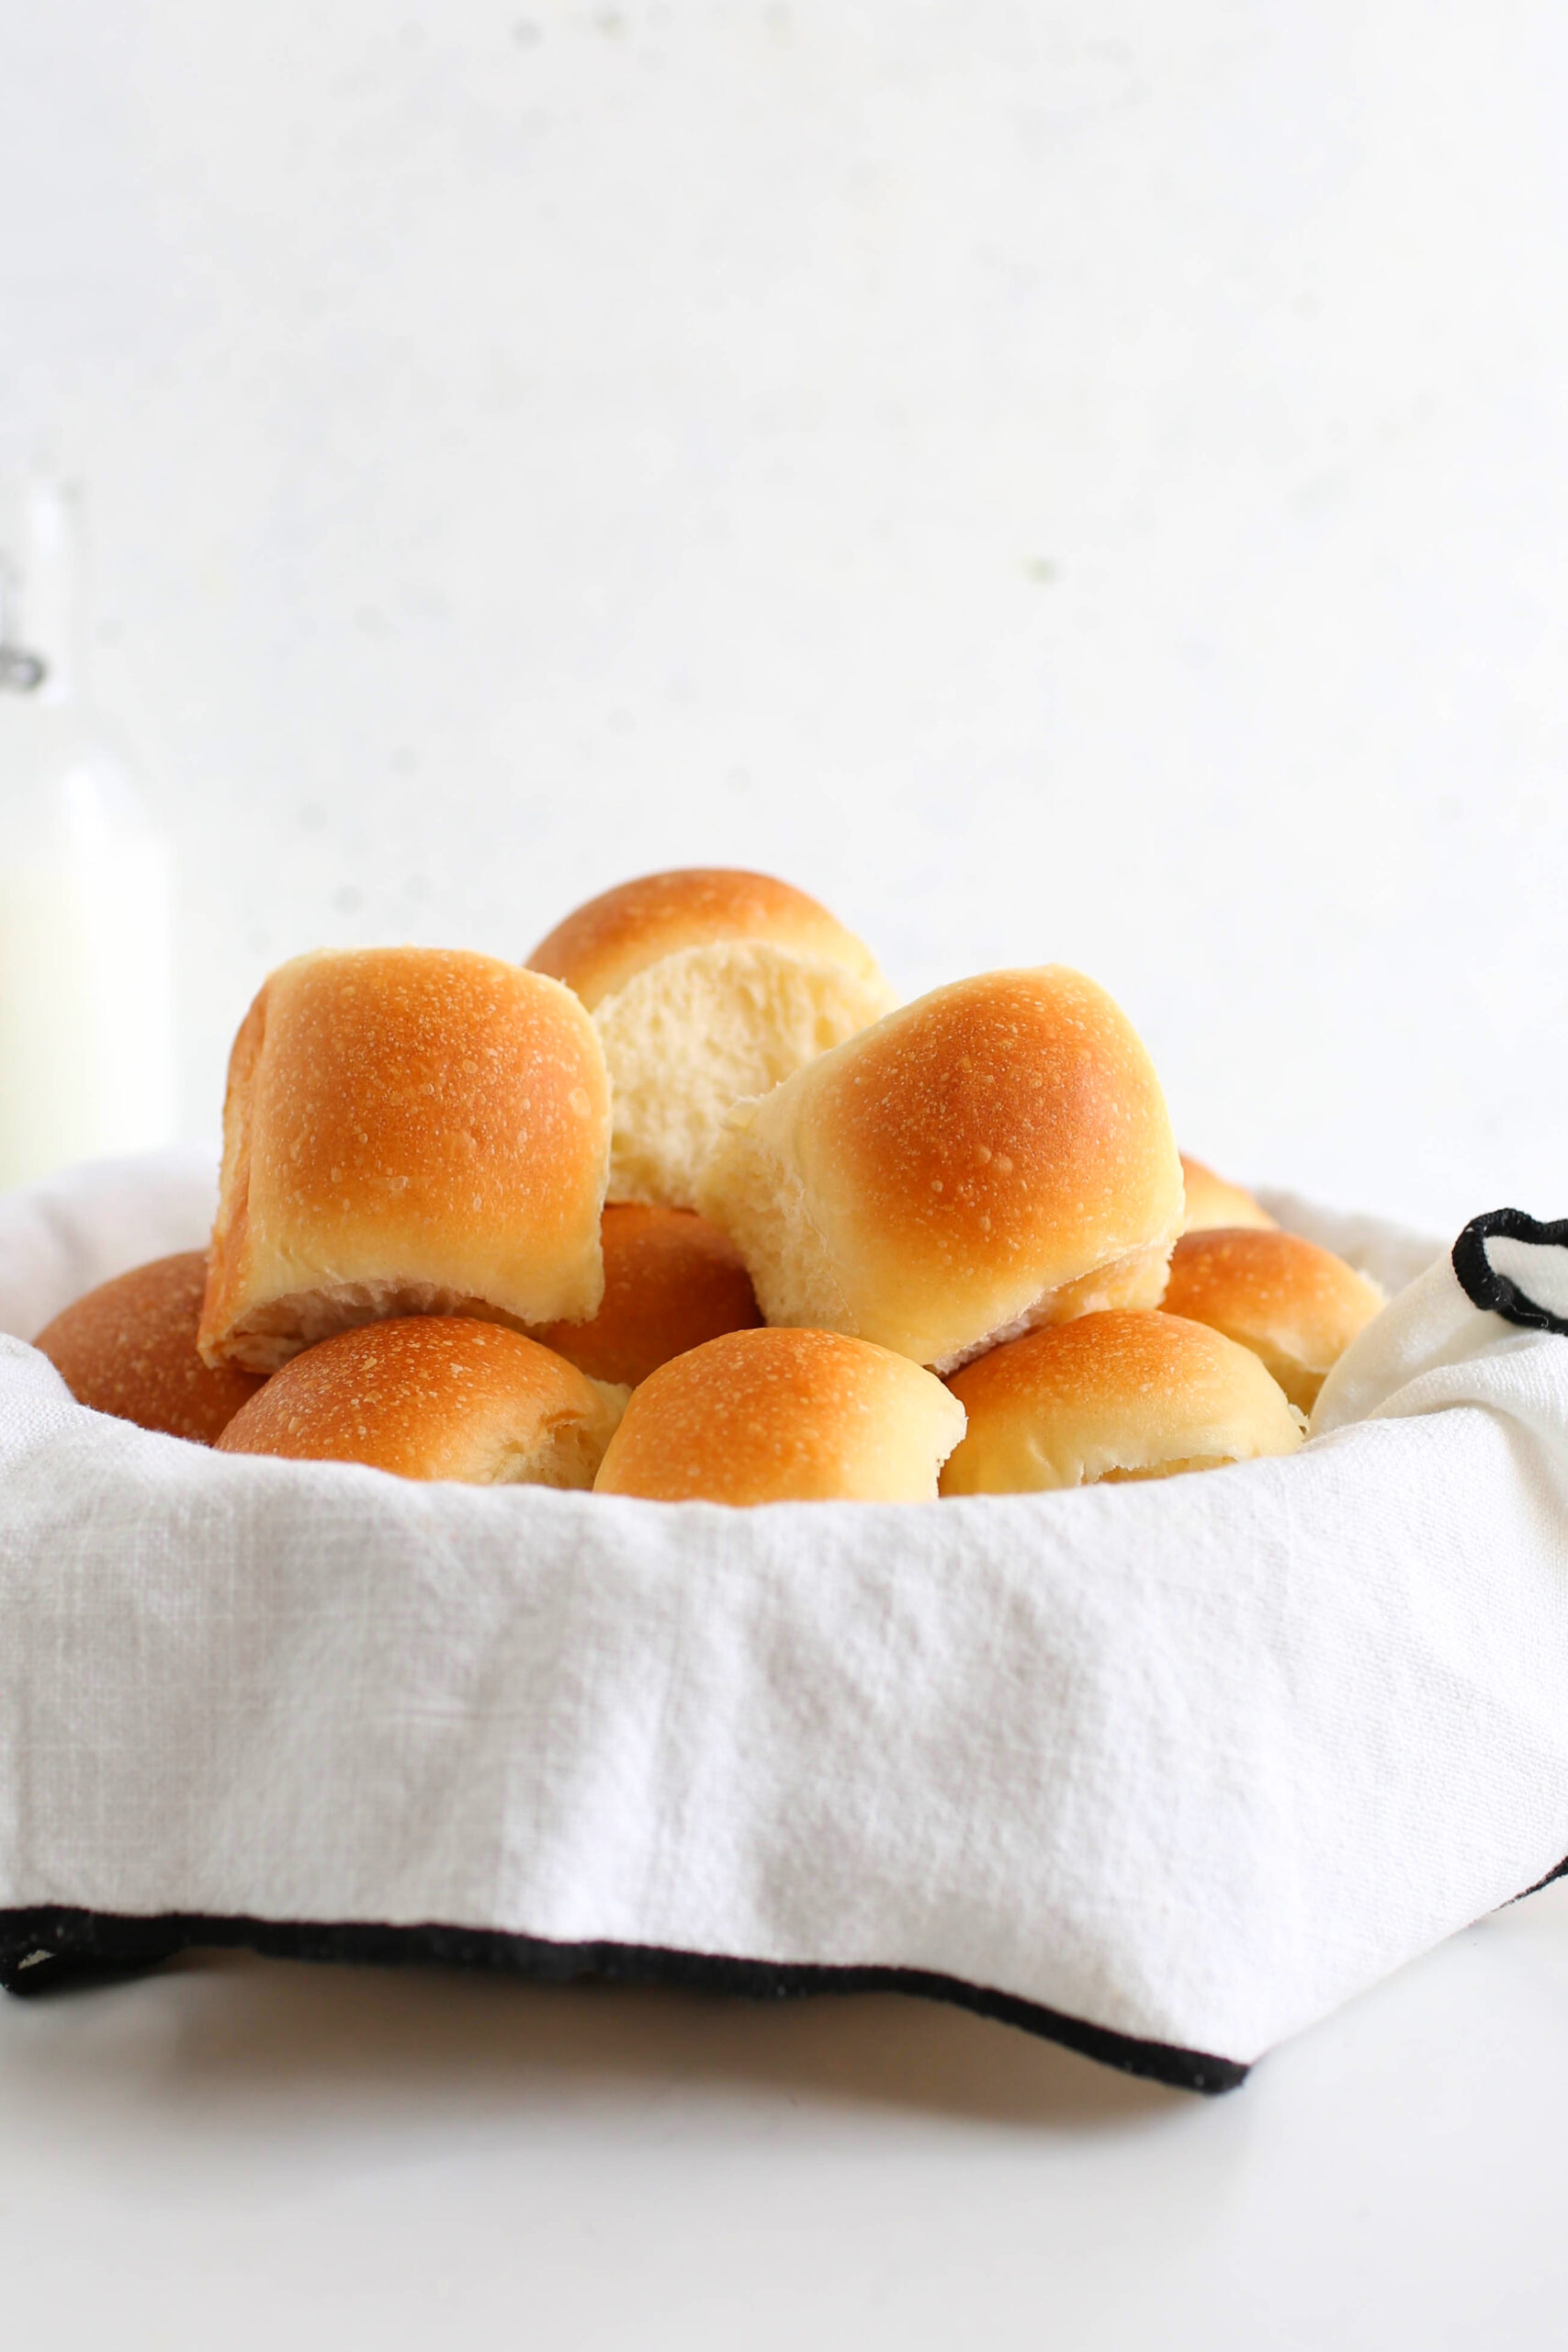
There’s nothing quite like the smell of homemade bread, and these soft, buttery dinner rolls will have everyone coming back for seconds. Make them once, and they’ll become a staple in your kitchen!
Soft and Buttery Dinner Rolls
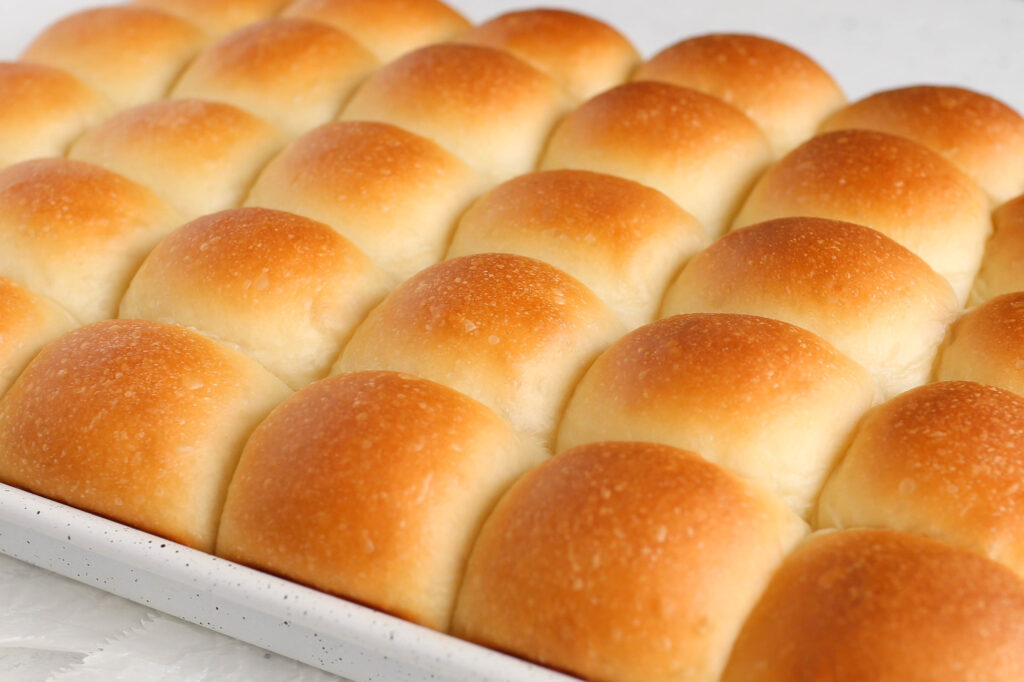
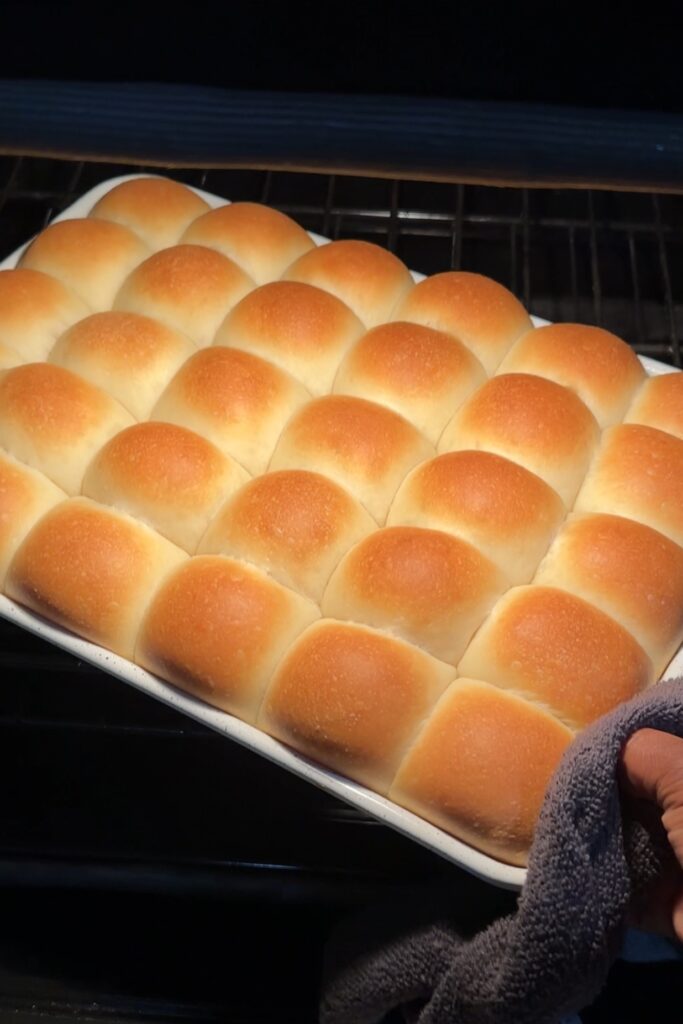
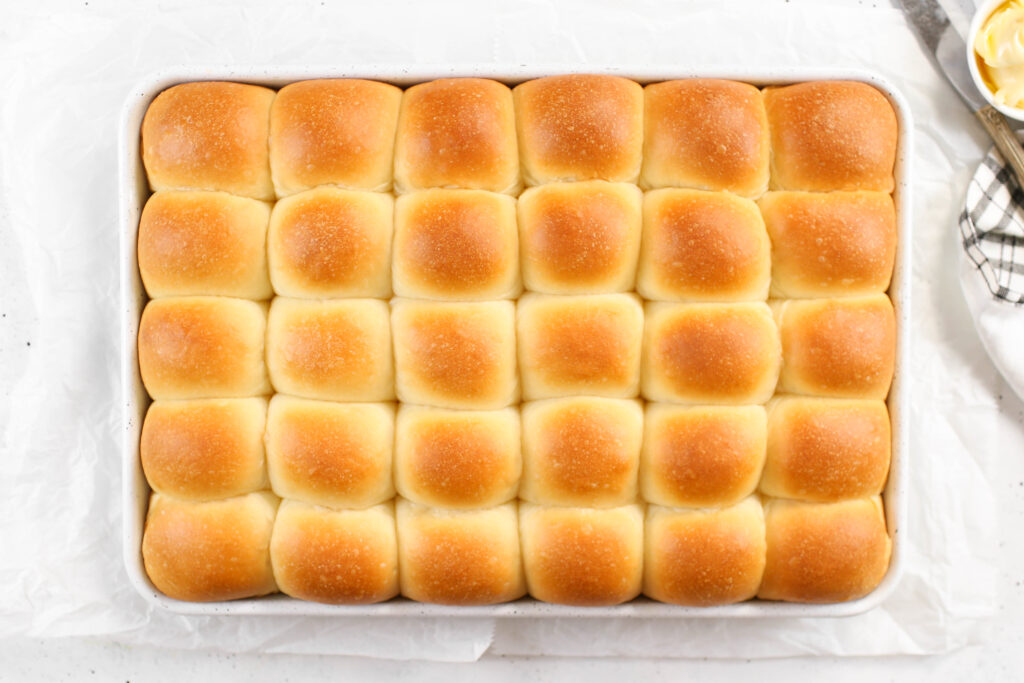
Picture this: a tray of warm, golden dinner rolls fresh out of the oven…soft, buttery, and irresistibly fluffy. Simply Amazing! Homemade bread might sound intimidating, but trust me, this recipe is straightforward and foolproof. With simple steps, helpful tips, and just a handful of everyday ingredients, you’ll bake rolls that are as stunning as they are delicious. Let’s get started! it!
Knead a little happiness in your life? These rolls have you covered.
What You’ll Need
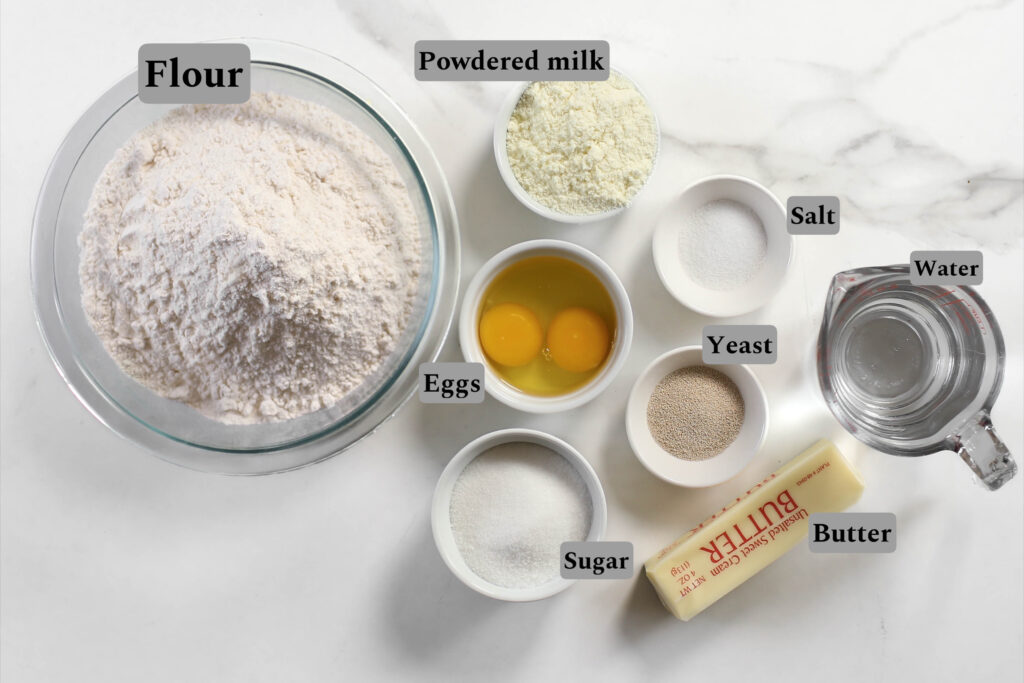
- Bread Flour: Bread flour is my go-to for dinner rolls because its higher protein content gives the perfect balance of soft and chewy texture. However, if you don’t have bread flour on hand, don’t worry, you can use all-purpose flour. The rolls may be slightly less chewy but still soft and delicious. You may also need a bit more flour if using AP flour.
- Yeast: I love using instant yeast because it’s so reliable and quick, but if all you have is active dry yeast, no problem! To use active dry yeast instead of instant yeast, dissolve the yeast in warm water with a bit of sugar and let it sit until frothy before adding it to the recipe.
- Water: Warm water is essential for waking up the yeast and creating a smooth, elastic dough. If you decide to use whole milk instead of powdered milk and water, make sure it’s warmed to 100-110°F…that’s the sweet spot to keep the yeast happy without killing it.
- Powdered Milk (Optional): Powdered milk is one of those ingredients that quietly works behind the scenes, adding richness and a touch of creaminess to the rolls. If you don’t have it, no worries, just swap out the powdered milk and water for warm whole milk, low-fat, or even skim milk. It’ll still turn out amazing!
- Sugar: A little sugar goes a long way. It doesn’t just sweeten the dough…it also feeds the yeast to help it rise and gives the rolls their gorgeous golden color.
- Eggs: Eggs are one of the secrets to rolls that are soft and tender yet hold their shape beautifully. Not a fan of eggs or out of them? You can leave them out. Just add an extra ¼ cup of water or milk per egg to keep the dough properly hydrated.
- Salt: Salt isn’t just for flavor; it’s also the yeast’s traffic cop, keeping it from overworking and giving the dough just the right rise.
- Butter: Oh, butter. It’s the star of the show here, making these rolls so rich and soft they practically melt in your mouth. I prefer unsalted butter so I can control the saltiness, but if you only have salted, just dial back the added salt in the recipe.
- Oil: A little oil is my secret weapon for rolls that stay soft and tender even the next day. It also helps the dough rise beautifully and gives the rolls a longer shelf life…if they last that long!
How to Make Dinner Rolls (Step by Step)
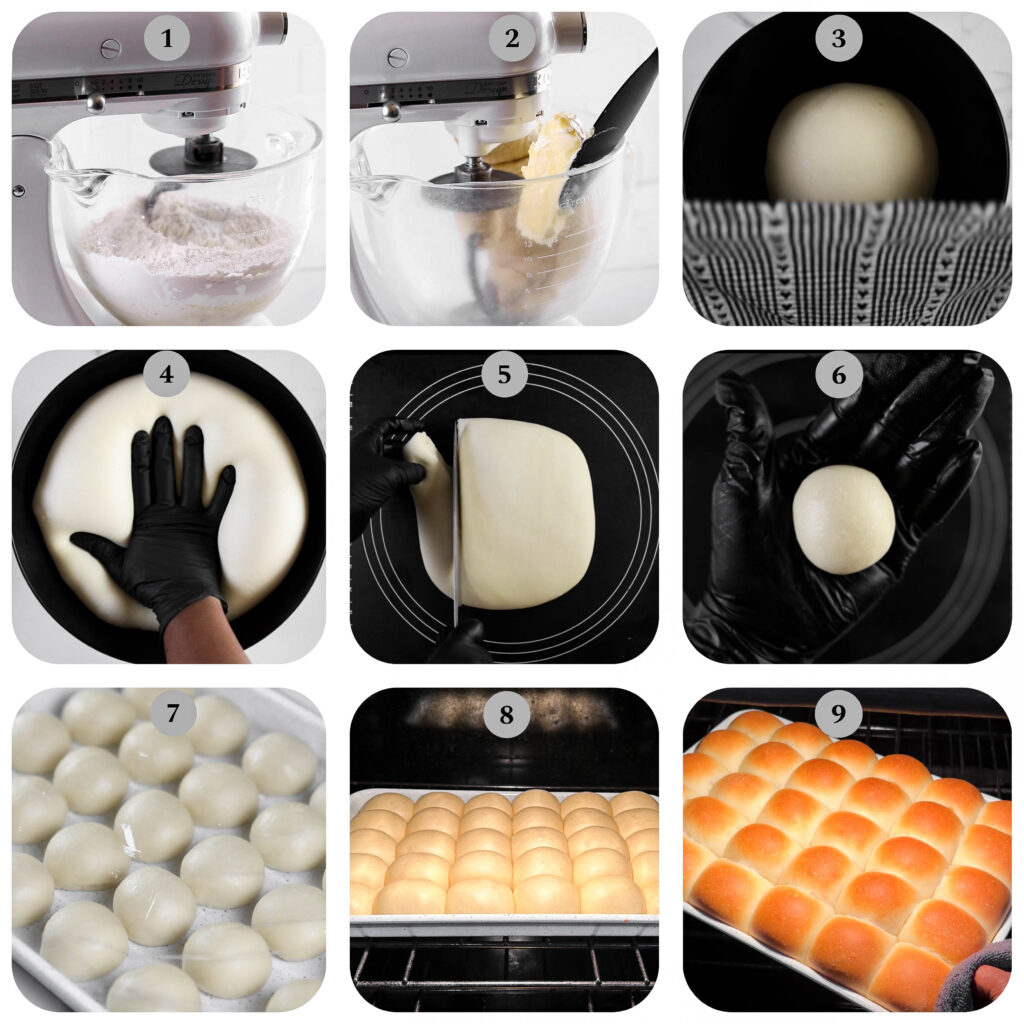
Step 1: Mix the Dry and Wet Ingredients (Image 1) In a stand mixer bowl, combine powdered milk (if using) with warm water, sugar, and instant yeast. Stir until the yeast dissolves. If using whole milk, replace powdered milk and water with warm milk.
Add eggs, bread flour, and salt to the bowl. Using a stand mixer fitted with a dough hook, mix on Speed 2 for about 2 minutes until the ingredients come together into a rough dough.
Tip: If you’re kneading by hand, use a wooden spoon or your hands to bring the dough together. It might be sticky at first, but that’s normal!
Step 2: Knead the Dough (Image 2) Increase the speed to Speed 4, knead for 2 minutes then add softened butter and oil. Continue kneading for 4 minutes until the dough becomes smooth and elastic. Increase the speed to 6 and knead for 2-3 more minutes to develop gluten fully.
Tip: Perform the windowpane test to check if the dough is ready. Take a small piece and stretch it slowly and gently; if it forms a thin, translucent sheet without tearing, the dough is perfect.

Step 3: First Rise (Image 3) Shape the dough into a smooth ball and place it in a lightly greased bowl. Turn it over to coat all sides. Cover with a clean kitchen towel or plastic wrap and let it rest in a warm spot for 1 to 1½ hours, or until doubled in size.
Tip: A warm oven with the light on or a sunny spot in your kitchen works best for proofing. Avoid placing the dough in a cold area, as this will slow down the rising process.
Step 4: Punch Down the Dough (Image 4) Gently punch the risen dough down with your fist to release any trapped air.
Step 5: Divide and Shape the Dough Use a sharp knife or bench scraper to divide the dough into equal portions.
Tip: To get evenly sized rolls, weigh the entire dough. For example, if the dough weighs 1,300g, divide it by the number of rolls you want (e.g., for 30 rolls each dough portion would weigh about 43g). Use a kitchen scale to measure each piece for uniformity, which ensures even baking. If you have time for that.
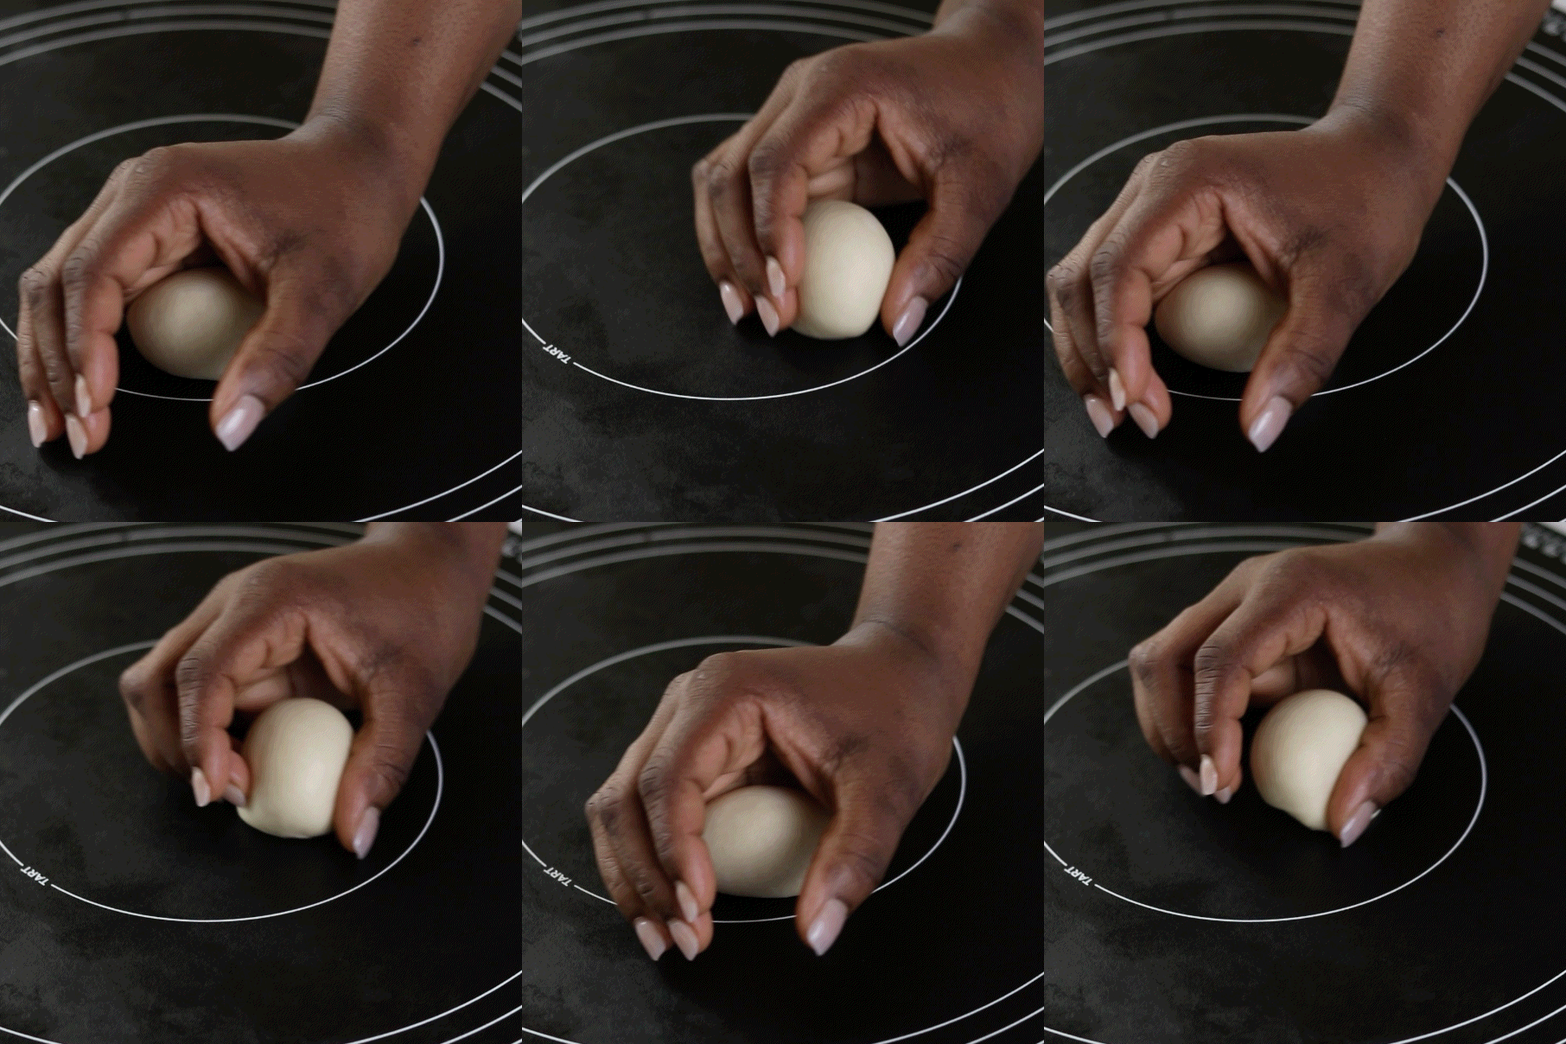
Step 6: Roll Each Piece(Image 6) Take each portion and roll it into a smooth ball. Tuck the edges underneath and gently roll it in your palm or on the countertop to create a tight, round shape.
Step 7: Second Rise (Image 7) Place the shaped rolls on a greased or parchment-lined baking tray, leaving a small gap between them to allow for spreading as they rise. Cover with plastic wrap(not tightly though, so the dough has enough space to rise). Let them rise for 30–40 minutes, or until puffy and doubled in size.
Step 8: Bake to Perfection (Image 8)Preheat your oven to 350°F (175°C). Bake the rolls for 18–20 minutes, or until the tops are golden brown.
Step 9: Enjoy your freshly baked bread rolls! Perfect for dinner, sandwiches, or simply enjoying warm with a pat of butter.
How to Make Dinner Rolls Ahead of Time
Let’s be honest, pulling off freshly baked rolls on a busy day can feel like a juggling act. But guess what? You can totally prep these golden, fluffy dinner rolls ahead of time and still have them tasting like they came straight out of the oven! Here are my go-to methods to make life easier without sacrificing flavor or softness.
Option 1: Prep the Dough the Day Before
This one’s for you if you want freshly baked rolls without the stress. After kneading the dough and letting it rise once, punch it down, shape your rolls, and place them on a baking tray. Cover tightly with plastic wrap and pop them in the fridge overnight (or up to 24 hours).
The next day, let the rolls sit at room temperature for about an hour until they puff up beautifully. Then bake them as usual and watch the magic happen.
Tip: This method works like a charm if you’re trying to impress without pulling an all-nighter in the kitchen!
Option 2: Freeze the shaped Dough
Got a little more time? Shape the dough into rolls, arrange them on a tray lined with parchment paper, and freeze until firm. Transfer the frozen rolls to a freezer bag, where they’ll happily wait for up to 3 months.
When you’re ready, place the frozen rolls on a baking tray, cover them with a towel, and let them thaw and rise at room temperature for 2–3 hours. Then bake, and voilà…fresh, fluffy rolls whenever you need them.
Tip: Write the date and baking instructions on the freezer bag, so you don’t have to play guessing games later. Trust me, you’ll thank yourself.
Option 3: Bake, Freeze, and Warm
Okay, let’s say you want to go full-on stress-free. Bake the rolls ahead of time, let them cool completely, and then freeze them in an airtight container or freezer bag. They’ll keep for up to 3 months.
To serve, thaw them at room temperature, then warm them in the oven at 300°F (150°C) for 10–15 minutes. Brush them with melted butter, and no one will ever guess they weren’t baked that same day.
Keep a batch of these in your freezer for those “just in case” moments, holiday guests, surprise dinners, or when you simply need a little carb therapy. There you have it! Making dinner rolls ahead doesn’t mean sacrificing that soft, buttery, just-baked goodness. Whether you’re prepping the day before or months in advance, these tips will have you serving fresh rolls like a pro without breaking a sweat.
Tips for Making the Best Dinner Rolls
- Use the Right Flour: Opt for bread flour if you want rolls that are soft yet sturdy. It has a higher protein content, which gives the rolls a chewy, pillowy texture.
- Check Your Yeast: Make sure your yeast is fresh and active. Proof it in warm water with a little sugar if you’re using active dry yeast to ensure it’s still alive.
- Knead well: After kneading, stretch a small piece of dough very gently. If it forms a thin, translucent sheet without tearing, your dough is ready, ensuring fluffy rolls.
- Let It Rise in the Right Spot: Dough loves warmth! Let it rise in a warm area like a slightly warm oven (turn on the light but not the heat) or near a sunny window.
- Weigh the Dough for Even Rolls: For consistent size, weigh your dough and divide it equally. For example, if the dough weighs 1,300g and you want 30 rolls, each piece should weigh about 43g.
- Preheat Your Oven: Always preheat your oven to the correct temperature before baking. A hot oven ensures the rolls rise quickly and bake evenly.
- Don’t Overbake: Bake the rolls just until golden brown on top. Overbaking can make them dry, so keep an eye on them during the last few minutes.
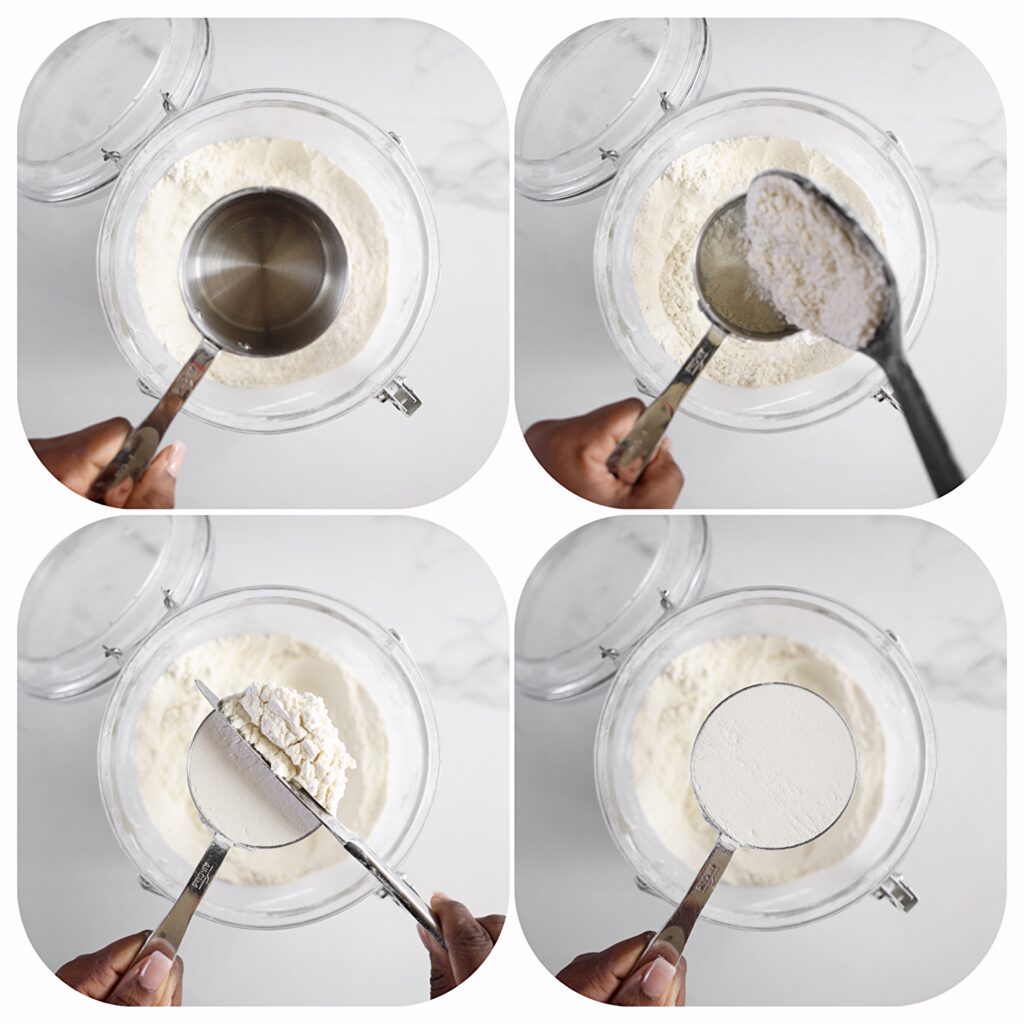
- Measure Ingredients Accurately: Use a kitchen scale for precision, especially with flour. Too much flour can result in dense rolls, while too little can make the dough sticky. In the absence of a kitchen scale, measuring cups and spoons are fine.
- To Use a Dry Measuring Cup accurately:
- Use a spoon to gently scoop flour into your measuring cup. Avoid scooping the flour directly with the measuring cup, as this can cause it to become packed, resulting in too much flour.
- Slightly overfill, then level off with a knife. Use the flat side of a knife or a straight edge to
- Ready to use.
Now, go forth and bake with confidence!
Ingredients
- 50 g powdered milk ½ cup
- 240 ml water 1 cup
- 7 g instant yeast 2 ¼ teaspoons
- 100 g sugar ½ cup
- 2 medium eggs 110g without shell
- 600 g bread flour about 5 cups
- 9 g salt 1 ½ teaspoons
- 115 g butter ½ cup or 1 stick, softened
- 10 g oil 2 teaspoons
Instructions
- Add powdered milk, water, sugar, and instant yeast. Stir until combined. If using active dry yeast, see Note 1.
- Add eggs, bread flour, and salt. Mix on Speed 2 or stir for 2 minutes until the dough starts to come together. If kneading by hand, see Note 4.
- Increase the mixer speed to 4 and knead for 2 minutes.
- Add the softened butter and oil. Continue kneading on Speed 4 for 4 more minutes.
- Increase to Speed 6 and knead for an additional 2 minutes until the dough is smooth and elastic.
- Transfer the dough to a lightly greased bowl. Turn it over to coat the surface.
First Rise
- Cover with a clean kitchen napkin or plastic wrap. Let it rise in a warm spot for 1 to 1 ½ hours, or until doubled in size. See Note 2 for tips on finding a warm spot.
- Punch down the dough to release air bubbles.
- Divide the dough into equal portions. Shape each piece into a smooth ball by tucking the edges underneath and rolling gently in your palm or on the countertop. See Note 3 for tips on portioning evenly.
- Place the rolls on a greased or parchment-lined baking tray, leaving space between them.
Second Rise
- Cover the rolls with plastic wrap or a clean kitchen napkin.
- Let them rise for 40–60 minutes, or until puffy and doubled in size.
- Preheat the oven to 350°F (175°C).
- Bake the rolls for 18–20 minutes, or until golden brown.
Notes
- Using Active Dry Yeast: Dissolve the yeast in the water along with 1 teaspoon of the sugar. Let it sit for 5–10 minutes until frothy, then proceed with the recipe.
- Finding a Warm Spot for Rising: The best places to let the dough rise are in an oven with the light on, near a sunny window, or on the countertop if your kitchen is warm. Avoid drafts or cold areas, which can slow the rising process.
- Dividing the Dough Equally: Weigh the entire dough and divide it evenly based on the number of rolls you want. For example, if the dough weighs 1,300g and you want 30 rolls, each portion should weigh about 43g. Use a kitchen scale for accuracy.
- Kneading by Hand: Turn the dough onto a lightly floured surface. Use the heel of your hand to push the dough away from you, then fold it back toward you. Rotate the dough slightly and repeat. Continue this motion for about 10–12 minutes, adding a sprinkle of flour if it becomes sticky. The dough is ready when it feels smooth, elastic, and passes the windowpane test (stretch a small piece into a thin sheet without tearing).
Did you make this recipe?
Tag, mention or DM @kikifoodies. I would love to hear from you!

I like your cooking. I also followed you on tiktok.
Very nice and delicious recipe.
Really love your recipes always.
If excellence was a person, that’ll be you Kiki. Thank you for always inspiring, not to talk of giving us the most delicious and easy to follow recipes, back to back to back. You are the best!!
Thank you so much for your kind words.
Thank you so much for your kind works Aisha.
Perfect
Looks yummy, definitely going to try this
I love how soothing your content is.
Well done
I love the aesthetics of your cooking and page. I also am in love with your recipes.
I recently came across your page and I am so drawn to it. I am just new to culinary and I hope through your page, I will grow and learn from you, ma’am.